
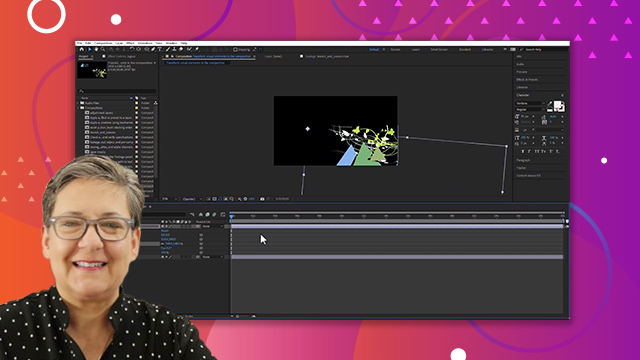
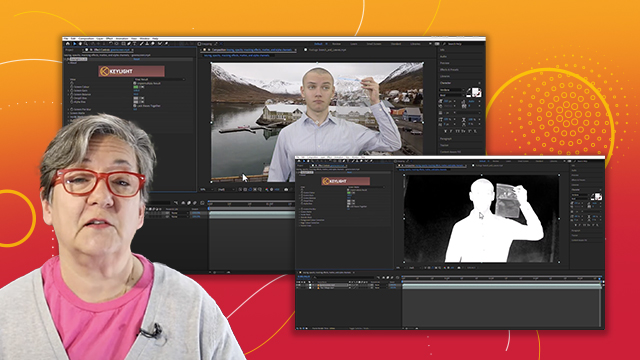
Masks & mattes (part 1)
Create, apply, and manipulate masks and track mattes.
This summary is AI generated
Learning Outcomes:
- Create and manipulate masks in After Effects.
- Apply track mats for layer transparency effects.
- Adjust mask properties for desired visual effects.
Level: Intermediate
Skills you'll gain:
After Effects, Masking, Tracking, Rotoscoping
Key Insights
- Use the 'M' key to reveal mask properties.
- Masks can be set to different blending modes.
- Adjust mask opacity and feather for smoother edges.
- Track matte uses transparency of one layer to affect another.
- Keyframe mask paths for dynamic animations.
- Rotoscoping allows for precise adjustments of masks.
- Practice makes mask manipulation easier over time.
- Layer selection is crucial when drawing masks.
- Transparency grids help visualize overlapping masks.
- Track matte can enhance text animations effectively.
Did the AI summary help? Let us know.
Learning outcomes
- Create and manipulate masks in After Effects.
- Apply track mats for layer transparency effects.
- Adjust mask properties for desired visual effects.
Key insights
- Use the 'M' key to reveal mask properties.
- Masks can be set to different blending modes.
- Adjust mask opacity and feather for smoother edges.
- Track matte uses transparency of one layer to affect another.
- Keyframe mask paths for dynamic animations.
- Rotoscoping allows for precise adjustments of masks.
- Practice makes mask manipulation easier over time.
- Layer selection is crucial when drawing masks.
- Transparency grids help visualize overlapping masks.
- Track matte can enhance text animations effectively.
Skills
After Effects, Masking, Tracking, Rotoscoping
Transcript
[00:00:00] foreign
[00:00:00] [Music]
[00:00:00] certification preparation series of
[00:00:00] videos I'm Louisa Winters in this video
[00:00:00] I want to cover objective
[00:00:00] 3.2 B which is to create apply and
[00:00:00] manipulate masks and track mats so let's
[00:00:00] get to it in After Effects let's go
[00:00:00] ahead and close any compositions that we
[00:00:00] may have open and let's open the
[00:00:00] composition called layer masks layer
[00:00:00] masks if you don't have the exercise
[00:00:00] files that's okay create a new
[00:00:00] composition create a solid and then just
[00:00:00] draw a mask on that solid all right but
[00:00:00] for those of you who have the exercise
[00:00:00] files let's work on this solid so if
[00:00:00] you're not showing the mask press the
[00:00:00] letter M M
[00:00:00] for mask and you're going to see mask
[00:00:00] one and then also mask path let's go
[00:00:00] ahead and delete that solid and let's
[00:00:00] create a new solid so layer new solid
[00:00:00] and I'm just going to make a darker
[00:00:00] Green Layer here click ok
[00:00:00] with the layer selected
[00:00:00] all I have to do is draw a mask
[00:00:00] if the layer is not selected and I draw
[00:00:00] a mask that's not a mask at all that's a
[00:00:00] shaped layer so if you draw a shape
[00:00:00] layer just for now go ahead and delete
[00:00:00] it if the layer is selected and you draw
[00:00:00] more masks
[00:00:00] they by default are set to a
[00:00:00] transparency of ADD
[00:00:00] and let me go ahead and hide that and I
[00:00:00] want to go back to
[00:00:00] the switches there you go I went to that
[00:00:00] and but you can change them so if I
[00:00:00] select all of these masks and I change
[00:00:00] them to subtract there you go I can
[00:00:00] change them to intersect so only where
[00:00:00] they overlap that will be visible I can
[00:00:00] change him to lighten which is just
[00:00:00] going to be the same as ADD not really
[00:00:00] it has to do with the transparency see
[00:00:00] the opacity of The Masks look look what
[00:00:00] happens if I make one or more of the
[00:00:00] masks more semi-transparent do you see
[00:00:00] how where they overlap is taking the
[00:00:00] opacity of the more solid one
[00:00:00] so I can also set them to let me just
[00:00:00] select all of them uh darken
[00:00:00] notice that where they meet is taking
[00:00:00] the opacity let me change this to the
[00:00:00] transparency grid so you can see it
[00:00:00] better it's using the opacity of the
[00:00:00] more
[00:00:00] transparent one see it
[00:00:00] and then finally difference which looks
[00:00:00] like yay and let me actually make these
[00:00:00] uh completely visible and do you see uh
[00:00:00] where uh that there's gaps here where
[00:00:00] they overlap when you copy and paste
[00:00:00] from illustrator they paste like this
[00:00:00] like difference all right so I'm just
[00:00:00] going to have one mask here
[00:00:00] and oh I deleted it inadvertly it
[00:00:00] doesn't matter I'm just gonna have one I
[00:00:00] made another one and I'm gonna kill the
[00:00:00] transparency grid here we go if I expand
[00:00:00] the mask I have something called mask
[00:00:00] path
[00:00:00] that I can change keyframe etc etc I can
[00:00:00] have a mask feather see so it just gives
[00:00:00] me like a feathered Edge I can have mask
[00:00:00] opacity
[00:00:00] and mask expansion so I can make my mask
[00:00:00] bigger or smaller and of course you
[00:00:00] already saw I can have different uh
[00:00:00] masks in one layer so there's a lot of
[00:00:00] things I can do with masks in here but I
[00:00:00] would dare say that one of the most
[00:00:00] important things that I can do with
[00:00:00] masks is interpolate them so here we go
[00:00:00] so let's go ahead and open the
[00:00:00] composition called track matte track
[00:00:00] matte and just for now let's not do the
[00:00:00] track matte let's still talk about masks
[00:00:00] so here we go I'm going to make the text
[00:00:00] invisible so I just click on the eyeball
[00:00:00] and now I'm going to duplicate duplicate
[00:00:00] the city reveal Ctrl D command D there
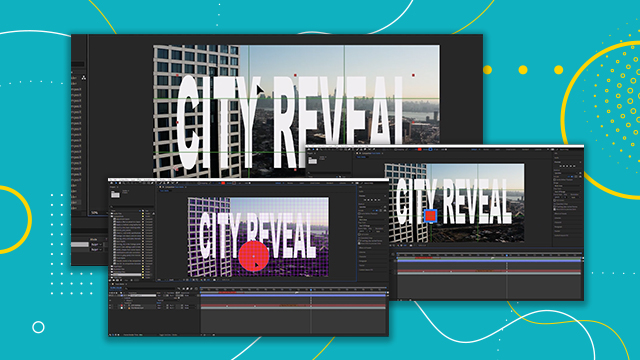
[00:00:00] you have it now I'm going to draw a mask
[00:00:00] around this building but it doesn't have
[00:00:00] to be the whole building right so I'm
[00:00:00] going to zoom in and I only need it from
[00:00:00] like
[00:00:00] here
[00:00:00] yeah
[00:00:00] we get the hand tool so here is good
[00:00:00] to here is good
[00:00:00] to here and I'm just clicking with the
[00:00:00] pen tool and there you have it right M
[00:00:00] for mask now I'm going to right click
[00:00:00] the word mask
[00:00:00] and now this tracker appears on the
[00:00:00] right hand side I'm going to track it
[00:00:00] forward and as it tracks it I'm going to
[00:00:00] really watch it carefully
[00:00:00] I'm just going to move that point
[00:00:00] to about yay
[00:00:00] and I'll continue tracking this
[00:00:00] and I'm still losing it but that's okay
[00:00:00] that's that's plenty now I'm going to
[00:00:00] put the city reveal in between those two
[00:00:00] all right so
[00:00:00] um I'm gonna make it visible and now I'm
[00:00:00] going to change the scale of this
[00:00:00] and I'm going to move it to around
[00:00:00] here
[00:00:00] and basically that's what it is see if
[00:00:00] the mask had worked properly you would
[00:00:00] really see the words City reveal are
[00:00:00] coming from behind the building we can
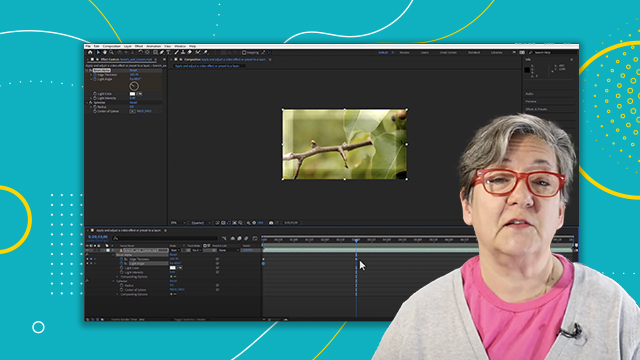
[00:00:00] easily do that with the branch and
[00:00:00] leaves for example in fact I'm going to
[00:00:00] create a new composition with that
[00:00:00] and I'm going to duplicate this
[00:00:00] and now I'm just going to
[00:00:00] mask this leaf
[00:00:00] about yay
[00:00:00] and I don't need to do the whole thing
[00:00:00] just that and now M for mask right click
[00:00:00] the words mask path I'm gonna
[00:00:00] zoom out a little bit and now I'm just
[00:00:00] gonna track it like yay and you as as it
[00:00:00] goes You See It Go and it actually is is
[00:00:00] doing a pretty good job tracking that
[00:00:00] and generally speaking it does a pretty
[00:00:00] good job we're going to talk about
[00:00:00] keyframing it by hand when it doesn't
[00:00:00] track it well so we're going to go back
[00:00:00] to the other building and then we're
[00:00:00] going to do it properly but notice how
[00:00:00] this is actually working really really
[00:00:00] really well so I think that's about
[00:00:00] that's about okay and now all I have to
[00:00:00] do is
[00:00:00] um I don't know I'll type something
[00:00:00] right and put them in between
[00:00:00] and now
[00:00:00] so I put this here it's going to look
[00:00:00] like the word something is behind the
[00:00:00] leaf
[00:00:00] of course you know it didn't uh
[00:00:00] I didn't finish tracking it but you get
[00:00:00] the point I'm gonna end the workspace
[00:00:00] there
[00:00:00] all right so when it doesn't work
[00:00:00] properly let's go back to the track
[00:00:00] matte and let's delete the mask right
[00:00:00] I'm just going to I'm going to do the
[00:00:00] whole building this time I'm going to do
[00:00:00] it from here to here to here to here and
[00:00:00] I'm just gonna close it there right so M
[00:00:00] for mask and I'm going to keyframe it
[00:00:00] right there it doesn't really matter
[00:00:00] where your playhead is just keyframe it
[00:00:00] where the playhead is now go all the way
[00:00:00] to the beginning and with the selection
[00:00:00] tool click outside of the Mask click
[00:00:00] completely outside of the mask and then
[00:00:00] click on one point at a time
[00:00:00] and like that
[00:00:00] all right now go all the way to the end
[00:00:00] or where to you don't see the building
[00:00:00] anymore say here
[00:00:00] and now we can move those points
[00:00:00] like
[00:00:00] that
[00:00:00] all right now we're gonna go towards the
[00:00:00] beginning like yay and we're going to
[00:00:00] adjust the points like that and notice
[00:00:00] that a new keyframe gets created each
[00:00:00] and every time now towards the end fix
[00:00:00] this
[00:00:00] so it's the beginning fix it and you
[00:00:00] will notice that the more you go back
[00:00:00] and forth
[00:00:00] the more you go back and forth the
[00:00:00] easier are these masks
[00:00:00] to be adjusted because they are almost
[00:00:00] where you need them to be
[00:00:00] see it
[00:00:00] and this starts becoming easier and
[00:00:00] easier and easier
[00:00:00] and you know the more you do this the
[00:00:00] more you realize it's like you know what
[00:00:00] I don't even need a mask here anymore
[00:00:00] but it's okay because I'm going to
[00:00:00] change the scale of the of the text so
[00:00:00] it's all good eventually you get really
[00:00:00] really good at this and this is also
[00:00:00] known as rotoscoping create a shortcut
[00:00:00] there I mean a keyframe there and there
[00:00:00] you go
[00:00:00] and there you go
[00:00:00] all right so this should actually work
[00:00:00] really well
[00:00:00] so a little bit of inconsistencies here
[00:00:00] I can just fix it
[00:00:00] by just going here and going okay
[00:00:00] and moving it like that's it
[00:00:00] that's pretty darn good and now that
[00:00:00] everything is masked I can make my text
[00:00:00] a little bit larger
[00:00:00] and move it to about yay
[00:00:00] and it's going to work really well all
[00:00:00] right so rotoscoping masking same
[00:00:00] difference all right so let's go ahead
[00:00:00] and revert
[00:00:00] and let's open the track matte
[00:00:00] composition all right so track matte
[00:00:00] composition this time we are going to
[00:00:00] make the words City reveal the track
[00:00:00] matte
[00:00:00] for the movie City Review alright and
[00:00:00] this is how it's done we are going to
[00:00:00] have the alpha channel of the text in
[00:00:00] other words the transparency of the text
[00:00:00] see where the
[00:00:00] checkerboard pattern is in fact I can
[00:00:00] even change the color of the text to
[00:00:00] Black
[00:00:00] everywhere that you see transparency in
[00:00:00] this layer you're going to see
[00:00:00] transparency in this layer and that's
[00:00:00] what the track map does so if you're not
[00:00:00] showing the switches and the modes go
[00:00:00] ahead and do that and we are going to go
[00:00:00] to the track matte column and from here
[00:00:00] see where it says Nomad choose City
[00:00:00] reveal and done that's it
[00:00:00] all right
[00:00:00] oh Luisa I'm finding it really hard to
[00:00:00] see yeah you know what create a solid
[00:00:00] make it any color I'm going to leave it
[00:00:00] green put it here at the bottom and
[00:00:00] there you have it
[00:00:00] all right so you can even animate the
[00:00:00] text right so say P for position
[00:00:00] keyframe it there and have it come from
[00:00:00] the outside
[00:00:00] to here
[00:00:00] and the only the the the body of the
[00:00:00] text The Fill of the text is going to be
[00:00:00] the video underneath
[00:00:00] track math is when the transparency of
[00:00:00] one layer affects another layer all
[00:00:00] right so that's track matte alrighty I
[00:00:00] think this brings us to the end of this
[00:00:00] video it was lengthy but it's very
[00:00:00] important especially the mask
[00:00:00] interpolation and this track matte
[00:00:00] invaluable all right so thank you for
[00:00:00] watching and I'll see you on the next
[00:00:00] video
[00:00:00] [Music]
[00:00:00] thank you


 AdChoice