
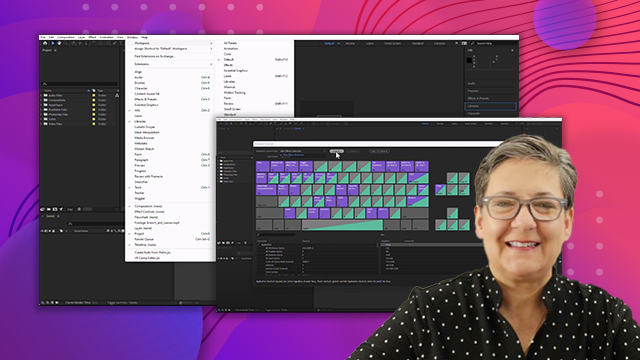
Everything you need to know about the project and timeline panels
Learn how to identify, navigate, and manipulate elements such as Key Panels: Project panel, and Timeline panel.
This summary is AI generated
Learning Outcomes:
- Navigate the After Effects interface effectively.
- Customize project and timeline panels for efficiency.
- Interpret footage settings for better control.
Level: Intermediate
Skills you'll gain:
After Effects, Interface Navigation, Customization, Footage Interpretation
Key Insights
- Use the project panel to manage assets efficiently.
- Customize column visibility in the project panel.
- Utilize the search bar for quick asset retrieval.
- Interpret footage to adjust frame rates as needed.
- Rename layers for better organization in the timeline.
- Use the shy guy icon to manage layer visibility.
- Toggle switches and modes for accessing blending options.
- Reset workspace to default for a clean setup.
- Create new folders to organize project files.
- Utilize the trash can icon for deleting assets.
Did the AI summary help? Let us know.
Learning outcomes
- Navigate the After Effects interface effectively.
- Customize project and timeline panels for efficiency.
- Interpret footage settings for better control.
Key insights
- Use the project panel to manage assets efficiently.
- Customize column visibility in the project panel.
- Utilize the search bar for quick asset retrieval.
- Interpret footage to adjust frame rates as needed.
- Rename layers for better organization in the timeline.
- Use the shy guy icon to manage layer visibility.
- Toggle switches and modes for accessing blending options.
- Reset workspace to default for a clean setup.
- Create new folders to organize project files.
- Utilize the trash can icon for deleting assets.
Skills
After Effects, Interface Navigation, Customization, Footage Interpretation
Transcript
[00:00:00] [Music]
[00:00:00] thank you
[00:00:00] [Music]
[00:00:00] hello and welcome to this after effects
[00:00:00] certification preparation series of
[00:00:00] videos I'm Louisa Winters in this movie
[00:00:00] I'd like to continue discussing
[00:00:00] objective 2.2 a which is to identify
[00:00:00] navigate and manipulate elements of the
[00:00:00] after effects interface in fact I want
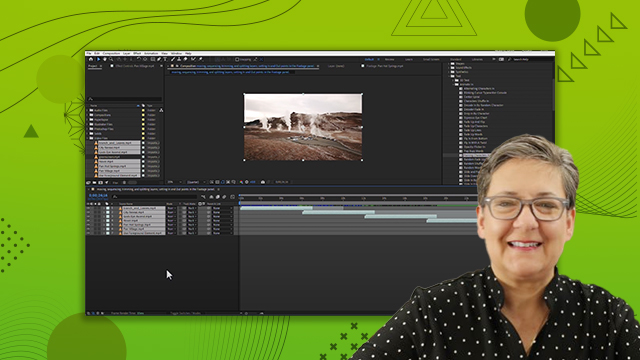
[00:00:00] to talk today about the project panel
[00:00:00] and the timeline panel so let's go into
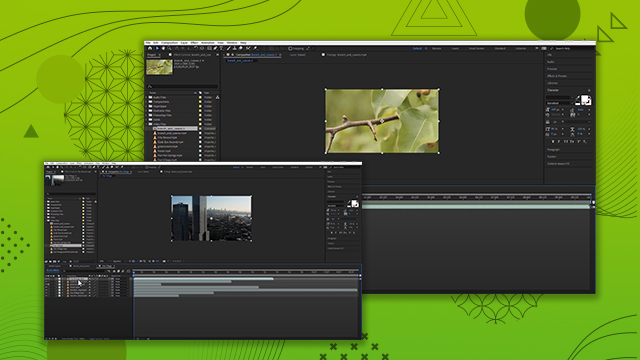
[00:00:00] after effects and get started this is
[00:00:00] the project that I was working on on the
[00:00:00] last movie so this is a composition that
[00:00:00] we created we called it new composition
[00:00:00] I just drag some movies down and all of
[00:00:00] that I'm going to continue working on
[00:00:00] this but if you're just joining us now
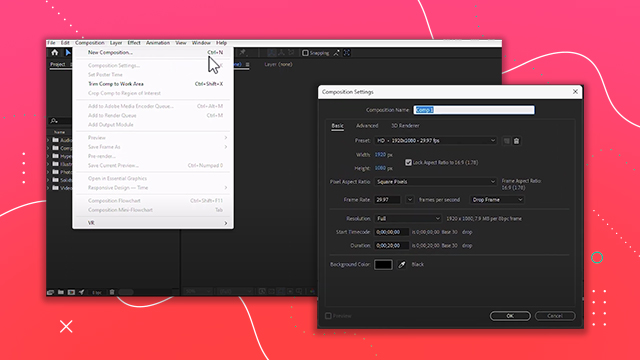
[00:00:00] create a composition just go composition
[00:00:00] new composition create a new composition
[00:00:00] and add some stuff to it and that's it
[00:00:00] we're not really going to do anything
[00:00:00] I'm just giving you some explanations on
[00:00:00] some of the icons on these panels let's
[00:00:00] get started with the project panel and
[00:00:00] for that I'm going to press and hold the
[00:00:00] Ctrl key which would be command on the
[00:00:00] Mac and I'm going to click and drag and
[00:00:00] just drag it out and the reason for that
[00:00:00] is because I want you to just see the
[00:00:00] project panel and I want it to be nice
[00:00:00] and large so that you can really see
[00:00:00] what's going on here
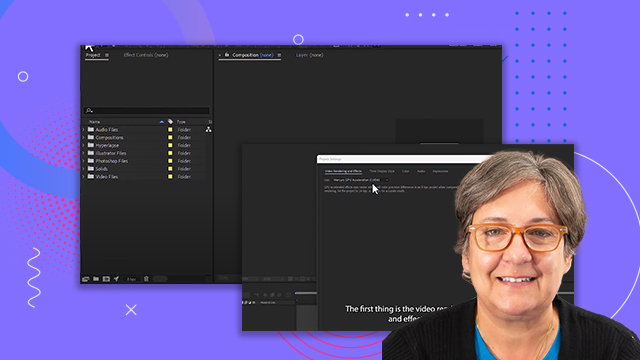
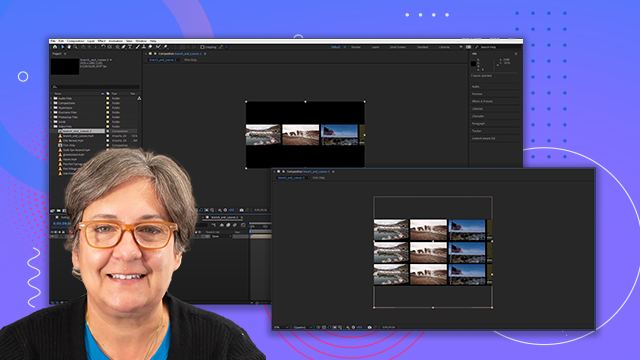
[00:00:00] next to the word project we have these
[00:00:00] three lines these are called the project
[00:00:00] uh the project panel menu or the panel
[00:00:00] menu some people call this the hamburger
[00:00:00] menu and if you click here you can
[00:00:00] customize some things so you can close
[00:00:00] the panel you can close the panel group
[00:00:00] you can have a stacked panel group you
[00:00:00] can have small tabs hey you know what
[00:00:00] you can customize it you can also change
[00:00:00] in here which columns you see so what
[00:00:00] columns is this this referring to look
[00:00:00] at this height size frame rate you can
[00:00:00] make these a little bit bigger too in
[00:00:00] and out Point type name comment etc etc
[00:00:00] so you can customize that in here for
[00:00:00] example I don't care about the type
[00:00:00] gone deselect it the check mark is no
[00:00:00] longer there and boom there you go
[00:00:00] you can also customize it by right
[00:00:00] clicking on the name of any of the
[00:00:00] columns so then you go column and there
[00:00:00] you go select the select whatever you
[00:00:00] want it doesn't matter and you can
[00:00:00] actually sort these things by the size
[00:00:00] the name the in and out points any of
[00:00:00] that so easy peasy if you don't want to
[00:00:00] see the type name right click hide disk
[00:00:00] all the things that are available in
[00:00:00] here are this little search see this
[00:00:00] little pool Loop magnifying glass
[00:00:00] whatever you want to call it you can
[00:00:00] click in there and then you can choose
[00:00:00] hey you know what I'm going to I need to
[00:00:00] search for missing effects I need to
[00:00:00] search for missing fonts for missing
[00:00:00] footage for unused footage for used
[00:00:00] footage if I choose unused all of these
[00:00:00] things appear because I'm not using any
[00:00:00] of them right now I'm just going to go
[00:00:00] ahead and click here again and just say
[00:00:00] hey no nothing recent
[00:00:00] and you can see how convenient this is
[00:00:00] right I can also click here and search
[00:00:00] for something for example
[00:00:00] Branch because I know that I have a
[00:00:00] composition named branch and leaves and
[00:00:00] I also know that I have a video file
[00:00:00] named branch and leaves so if I'm
[00:00:00] looking for something and I have so many
[00:00:00] things in my project panel that I can't
[00:00:00] seem to find it there's a search bar
[00:00:00] right here so I'm going to delete that
[00:00:00] so that I'm not really filtering any
[00:00:00] results but anyway here at the bottom
[00:00:00] left you see that there are other icons
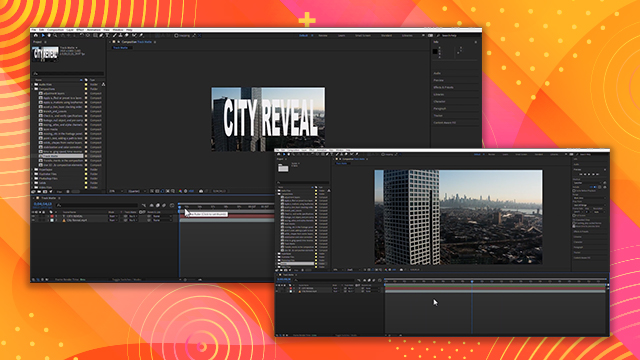
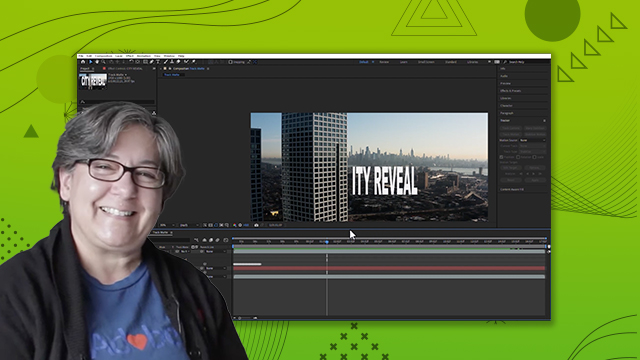
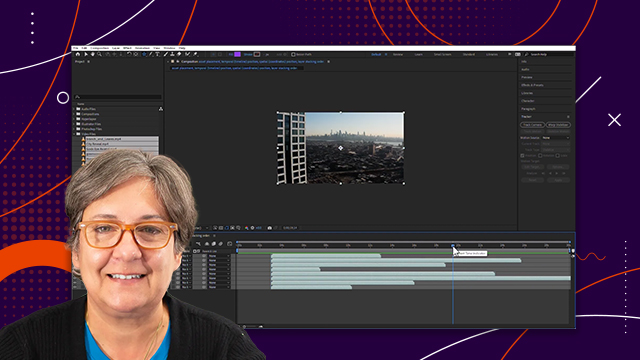
[00:00:00] in the project panel this one is for
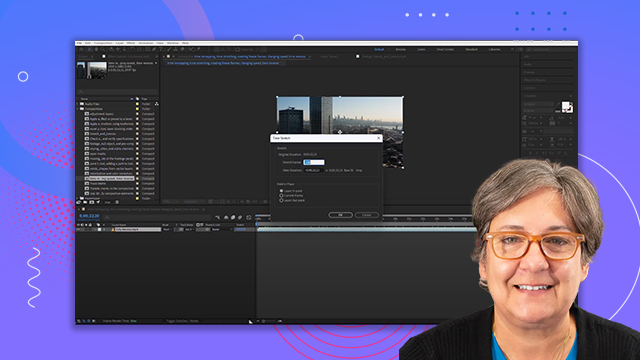
[00:00:00] interpreting footage so you can select
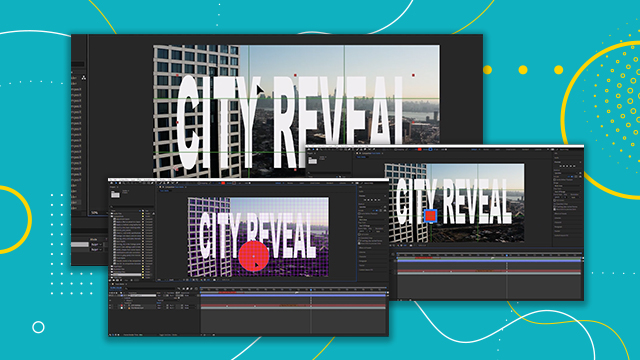
[00:00:00] any of these video files say this city
[00:00:00] reveal and then you can click on
[00:00:00] interpret footage and you can tell it
[00:00:00] hey you know what don't use the frame
[00:00:00] rate that came from the file use
[00:00:00] something different maybe 15 frames per
[00:00:00] second or whatever this is really really
[00:00:00] useful for when you shoot at high uh
[00:00:00] frame rates say you're shooting at 120
[00:00:00] frames per second but you want to play
[00:00:00] it slow motion at 30. so interpret it
[00:00:00] change it instead of use frame rate from
[00:00:00] this
[00:00:00] to what whatever was recorded right in
[00:00:00] our case 120 switch it to 30 or 29.97 so
[00:00:00] easy peasy there are other things that
[00:00:00] you can customize you can customize the
[00:00:00] beginning time code number you can
[00:00:00] customize uh things like the the pull
[00:00:00] down and you can also change the pixel
[00:00:00] aspect ratio these go out of the scope
[00:00:00] of what the test is going to cover but
[00:00:00] just keep in mind that you can
[00:00:00] you can interpret footage for these
[00:00:00] things including color you can turn
[00:00:00] color Management on for for this and you
[00:00:00] can change interpretation so you know
[00:00:00] just keep that in mind that you have a
[00:00:00] lot of options on their interpret
[00:00:00] footage I'm just going to cancel out of
[00:00:00] here because I'm not really changing
[00:00:00] anything
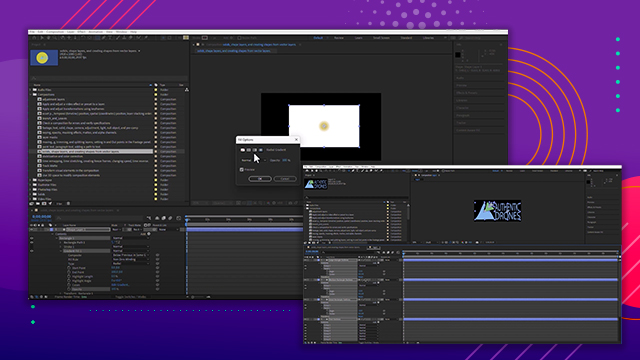
[00:00:00] the next icon that we have is to create
[00:00:00] a new folder that's self-explanatory
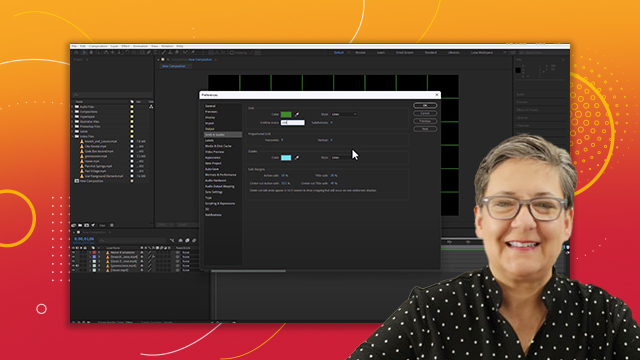
[00:00:00] create a new composition we already
[00:00:00] talked about that the project settings
[00:00:00] which we also discussed if we click here
[00:00:00] it opens the same project settings that
[00:00:00] we open when we went to file project
[00:00:00] settings same panel this is telling us
[00:00:00] that we are at eight bits per Channel we
[00:00:00] also discussed that and if we select
[00:00:00] anything we can uh delete it simply by
[00:00:00] clicking on this little trash can and
[00:00:00] you know that is the project panel so
[00:00:00] I'm going to dock it back here and in
[00:00:00] fact you know what let me go ahead and
[00:00:00] reset the default to workspace and there
[00:00:00] you go and by the way I resetted it
[00:00:00] simply by double clicking its name right
[00:00:00] so there you go it asks me are you sure
[00:00:00] you want to and blah blah blah revert
[00:00:00] and there you have it so let's go ahead
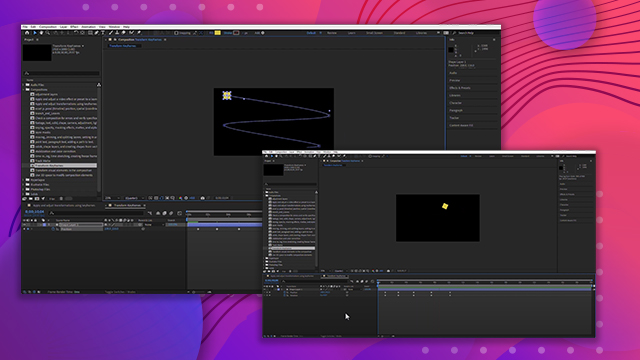
[00:00:00] and talk about the timeline panel now
[00:00:00] I'm going to press and hold the Ctrl key
[00:00:00] and I'm going to drag it out only
[00:00:00] because I want you to be able to see it
[00:00:00] right in the middle here
[00:00:00] and I'm going to make this a little bit
[00:00:00] taller yeah just to cover the the
[00:00:00] background
[00:00:00] there you go I'm not gonna really tell
[00:00:00] you everything about here or this is
[00:00:00] gonna be a really long movie but I'm
[00:00:00] going to tell you about the most
[00:00:00] important things look at these you see
[00:00:00] these here this is the eyeball this
[00:00:00] hides that layer or shows it so you know
[00:00:00] I can either click and drag and make all
[00:00:00] of the layers invisible or make all of
[00:00:00] the layers visible the same with this
[00:00:00] little loudspeaker thing this will mute
[00:00:00] the audio or unmute it right notice that
[00:00:00] only one of these has audio included
[00:00:00] that's why this is not available in the
[00:00:00] other layers this little ping pong ball
[00:00:00] solos so if I only want to see that
[00:00:00] layer and now I'm going to move this out
[00:00:00] of the way and in fact I'm going to go
[00:00:00] back
[00:00:00] if I just want to see this layer I click
[00:00:00] here and there you go it hides all the
[00:00:00] other layers and shows only that one and
[00:00:00] yes you can solo more than one layer
[00:00:00] right then you have a label uh color and
[00:00:00] you can change it by clicking on it say
[00:00:00] I need you to be blue I want you to be
[00:00:00] red whatever it doesn't matter but you
[00:00:00] can use this to very quickly
[00:00:00] differentiate between your layers so it
[00:00:00] starts becoming kind of important now
[00:00:00] you have the layer number you cannot
[00:00:00] change this the layer on top will always
[00:00:00] be layer one then the subsequent ones
[00:00:00] would be two three four five six you
[00:00:00] know you can't change that so if I glab
[00:00:00] if I grab the red layer and put it here
[00:00:00] on top then the red layer becomes number
[00:00:00] one all right so you cannot change that
[00:00:00] the source name that you can change well
[00:00:00] you can't change the source name but you
[00:00:00] can change
[00:00:00] you can change the layer name in After
[00:00:00] Effects you can rename almost anything
[00:00:00] and you do so by selecting the name and
[00:00:00] then pressing enter or return right and
[00:00:00] then name it
[00:00:00] whatever
[00:00:00] they meant whatever but see how now this
[00:00:00] says layer name and you can click on it
[00:00:00] and then in Source name and you can
[00:00:00] click on it again so on the column
[00:00:00] header and it gives you the layer name
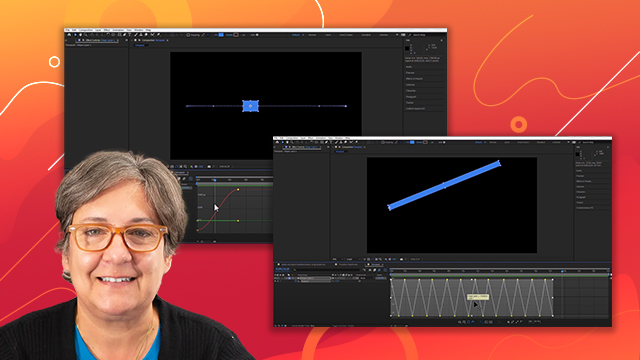
[00:00:00] all right so the next
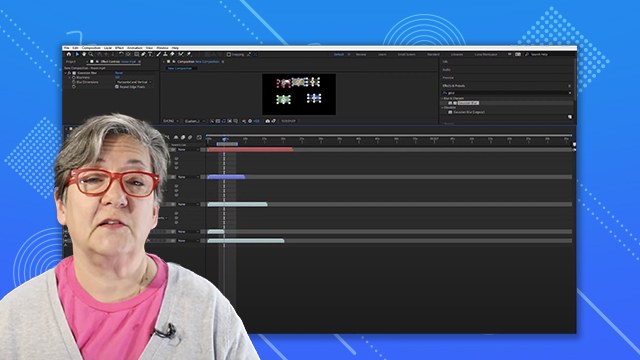
[00:00:00] set of icons and these will be the last
[00:00:00] ones that I cover in this movie are
[00:00:00] going to be the switches we start with
[00:00:00] this guy the shy guy so this makes the
[00:00:00] layer invisible here in the timeline but
[00:00:00] not in the comp panel so let me just do
[00:00:00] this really quickly I'm going to make
[00:00:00] these layers much smaller and then I'm
[00:00:00] just going to click and drag it so that
[00:00:00] we can see these layers at the same time
[00:00:00] look at the difference
[00:00:00] if I make one of these layers invisible
[00:00:00] see how that's the branch and leaves
[00:00:00] hey I can still see it here in the
[00:00:00] timeline but if I click on that eyeball
[00:00:00] I no longer see it here in the comp
[00:00:00] panel in other words in the monitor look
[00:00:00] at the difference now if I click on the
[00:00:00] shy guy it's going to disappear from the
[00:00:00] timeline but you will still be able to
[00:00:00] see it in the comp panel and you may be
[00:00:00] asking yourself hey Luisa you know you
[00:00:00] clicked on the switch and it didn't
[00:00:00] disappear that's because there are some
[00:00:00] switches that need to be turned on in
[00:00:00] two places they need to be turned on at
[00:00:00] the layer level which is what I just did
[00:00:00] and they also need to be turned on at
[00:00:00] the comp layer see this guy here it
[00:00:00] disappears now from the timeline but
[00:00:00] it's still visible here in the monitor
[00:00:00] or on the comp panel so I can do that
[00:00:00] with any of these so I can just boom
[00:00:00] make all of these invisible boom boom
[00:00:00] boom right and now I see like one layer
[00:00:00] but clearly I have five this is how most
[00:00:00] templates ship all right most templates
[00:00:00] are going to ship and you're going to
[00:00:00] get them with a whole bunch of hidden
[00:00:00] layers and then you're trying to modify
[00:00:00] something and you're just going hey you
[00:00:00] know where where is it yeah you know
[00:00:00] what just click on this little icon here
[00:00:00] boom and now you can see them again all
[00:00:00] right I'm gonna make all of them visible
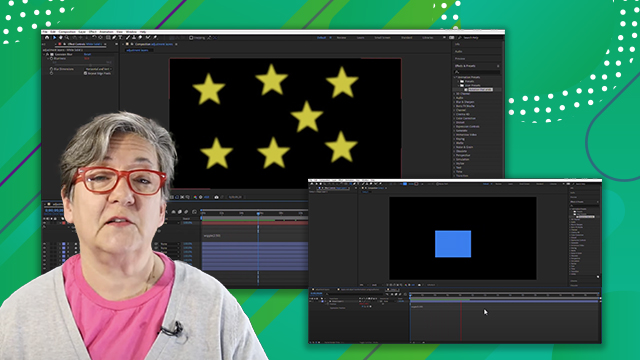
[00:00:00] again the rest of the switches I'm gonna
[00:00:00] skip for now and uh there is just one
[00:00:00] last button that I want to take you over
[00:00:00] which is this one here at the bottom
[00:00:00] that says toggled switches and modes
[00:00:00] toggle switches and modes if you click
[00:00:00] here you're going to go to modes track
[00:00:00] mats etc etc and if you click again you
[00:00:00] see the switches
[00:00:00] if in the test they tell you to oh you
[00:00:00] know change the blending mode to
[00:00:00] whatever of this layer right select the
[00:00:00] layer and then you go oh my God where's
[00:00:00] the blending mode click on switches and
[00:00:00] modes and there are your blending modes
[00:00:00] right right here on the modes and if by
[00:00:00] any reason that fails you know you you
[00:00:00] just you can't find the button you you
[00:00:00] don't see it blah blah blah right click
[00:00:00] the column name right click the column
[00:00:00] name say the words layer name
[00:00:00] go to columns and then choose modes or
[00:00:00] choose switches or choose keys or a
[00:00:00] switch to you know or choose render time
[00:00:00] or whatever it is that they're asking
[00:00:00] you to do just make sure that you're
[00:00:00] showing that column all right
[00:00:00] and this brings us to the end of this
[00:00:00] video thank you for watching and see you
[00:00:00] on the next video
[00:00:00] [Music]
[00:00:00] thank you


 AdChoice