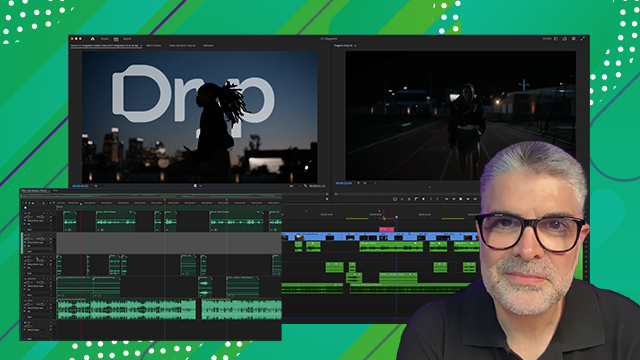
[00:00:01] hi there in this short video we're going
[00:00:03] to be talking about track targeting
[00:00:06] marking In-N-Out points and also making
[00:00:08] selections within the timeline and how
[00:00:12] they kind of interact with each other
[00:00:14] one common gotcha that I see from Avid
[00:00:17] editors is that often times they'll
[00:00:19] accidentally select something in the
[00:00:20] timeline and then they're trying to do a
[00:00:22] very precise action using track
[00:00:24] targeting using in andout ranges and
[00:00:26] they're wondering why is Premiere
[00:00:28] ignoring all of that and doing something
[00:00:30] completely different let me show you so
[00:00:33] to start with here I am in my timeline
[00:00:36] currently I've got all my tracks
[00:00:38] selected you can see here I've got V1
[00:00:41] through V5 I've got A1 through A7
[00:00:44] currently selected and uh what I'm going
[00:00:47] to do it's actually a V1 through V8 from
[00:00:50] the look of it here now what I'm going
[00:00:52] to do is I want to make a very precise
[00:00:54] selection in my timeline and really the
[00:00:57] area that I need to affect is just on V
[00:01:00] V1 and V2 so I'm going to hold down the
[00:01:02] command key here and drag up to kind of
[00:01:06] make sure that I've got all my upper
[00:01:07] tracks deselected we'll go ahead and
[00:01:10] deselect V1 and V8 and then in this case
[00:01:13] I don't need to do anything with my
[00:01:15] audio so I'm going to make sure and uh
[00:01:20] go ahead and hold down the command key
[00:01:22] again drag up along here make sure that
[00:01:24] I've got all my audio turned off as well
[00:01:27] so now I just have V1 and V to select it
[00:01:31] now I'm going to go ahead and make an in
[00:01:33] andout range
[00:01:35] here we'll go ahead and start from the
[00:01:37] head of this clip here I'm holding down
[00:01:39] the shift key while I do that to snap
[00:01:42] the playhead to the beginning of that
[00:01:43] clip in V1 I'll mark an
[00:01:46] inpoint and then I'm going to come over
[00:01:48] here and I'm going to mark an outp point
[00:01:50] right
[00:01:51] here now let me go ahead and select
[00:01:54] something completely outside of the
[00:01:56] range that I have designated here I'm
[00:01:59] going to come over over here and select
[00:02:00] this clip and let's just look at that
[00:02:02] clip just to see what it is here H maybe
[00:02:05] we'll select the clip next to it that's
[00:02:07] really really different it's uh very
[00:02:10] noticeable what that is here now I've
[00:02:13] got that clip selected in my timeline
[00:02:16] you can see that it's got a little white
[00:02:17] outline around it showing that that clip
[00:02:20] is currently the selected clip and then
[00:02:22] I'm going to come over here where I've
[00:02:24] got my In-N-Out range and I'm going to
[00:02:27] go ahead and hit shift U to make a
[00:02:30] subsequence this is something I showed
[00:02:32] in a previous video about how to load
[00:02:34] part of my timeline into the source
[00:02:38] monitor now you may be looking at that
[00:02:40] going wait a minute I have an In-N-Out
[00:02:42] range selected I've gone in and I've
[00:02:44] selected V1 and V2 what the heck has
[00:02:46] happened here it's loaded up a clip that
[00:02:49] doesn't even exist in the range that I'm
[00:02:52] currently looking for again what it did
[00:02:55] was it made a subsequence based on my
[00:02:58] selection in the timeline anytime you
[00:03:02] have a clip selected in a premier
[00:03:05] timeline that clip is what Premiere
[00:03:09] thinks that you want to work with
[00:03:11] selection overrides your in andout marks
[00:03:15] it overrides track targeting and this
[00:03:18] can be a hard concept to wrap one's
[00:03:20] brain around because if you're doing
[00:03:23] that type of precise work you may think
[00:03:25] you know hey Premiere do what I'm asking
[00:03:27] you to do here but it is let me show you
[00:03:30] this one more time I'm going to come
[00:03:31] over here and select another random clip
[00:03:35] here just so I have that selected now
[00:03:38] I'm going to come back over here into my
[00:03:40] edit range I've got my inpoint my outp
[00:03:43] point I've carefully adjusted my track
[00:03:45] targeting just for the heck of it I'm
[00:03:47] also going to add A2 here just to get
[00:03:49] out something extra and again I'm going
[00:03:52] to hit shift U to copy that and it's
[00:03:56] grabbed something completely strange and
[00:03:59] random from me why because it's going
[00:04:02] through and looking at whatever my
[00:04:04] selection is and that's what's ending up
[00:04:07] over in the source monitor not my
[00:04:10] In-N-Out range now it's very very easy
[00:04:12] to fix this all I have to do is click
[00:04:15] away from anything so nothing is
[00:04:17] selected in the timeline or even better
[00:04:21] I recommend going into your keyboard
[00:04:23] shortcuts and there is a keyboard
[00:04:26] shortcut called
[00:04:27] D select all there it
[00:04:31] is now I typically I think the default
[00:04:34] is this uh shift command a but I kind of
[00:04:38] like having the uh something like the
[00:04:40] F12 key or something very very easy to
[00:04:44] remember uh as a keyboard shortcut for
[00:04:46] this so I'm going to go ahead and I'll
[00:04:49] delete the existing one I'm just going
[00:04:50] to leave it as F12 so it's up here I'll
[00:04:53] go ahead and click okay now if I've
[00:04:56] accidentally selected some clips or
[00:04:58] something like that particularly if you
[00:05:00] scroll them off the screen it's one of
[00:05:02] those things that you know you may not
[00:05:04] have any idea what Premiere is doing
[00:05:06] because it the selection that you've
[00:05:08] made is not even visible at that point
[00:05:10] but it still is what Premiere is going
[00:05:12] to take when you use commands like copy
[00:05:15] paste make subsequence other types of
[00:05:19] commands so what I want to do now now
[00:05:21] that I have this selected I'm going to
[00:05:23] go ahead and press the F12 key that just
[00:05:26] clears out that selection so now when I
[00:05:29] do shift you I actually get the range of
[00:05:34] clips that I was looking for that I
[00:05:36] selected within my In-N-Out range so
[00:05:39] it's not a bug it is just a default way
[00:05:42] that Premiere Works um where you want to
[00:05:44] use selections and you have that ability
[00:05:46] to you know make a large selection and
[00:05:49] do something with that it can really
[00:05:51] come in handy and there are a lot of
[00:05:53] editors Premier editors in particular
[00:05:56] that like to use that selection
[00:05:58] functionality if you do do want to
[00:06:00] really work with track targeting in
[00:06:02] andout ranges just remember deselect
[00:06:05] everything first and then Premiere will
[00:06:06] do exactly what you're asking it to do
[00:06:09] thanks for watching