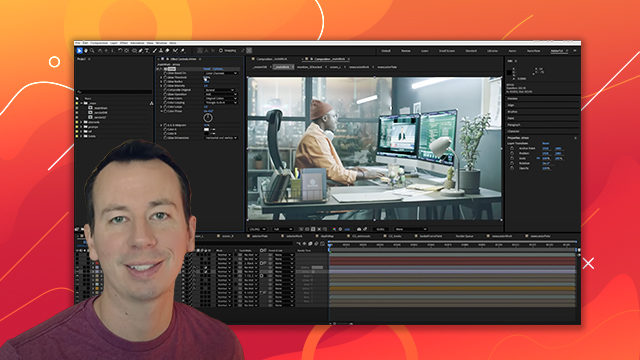
Tony Lupoi
Visual effects supervisor
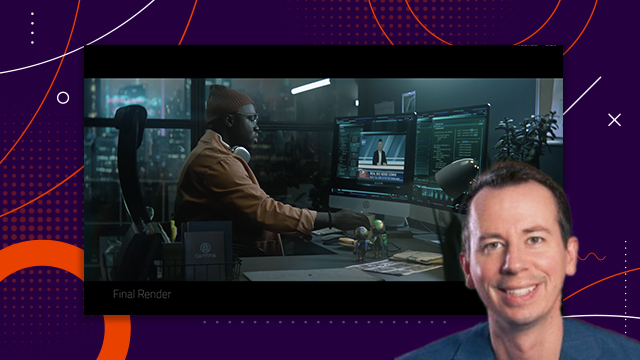
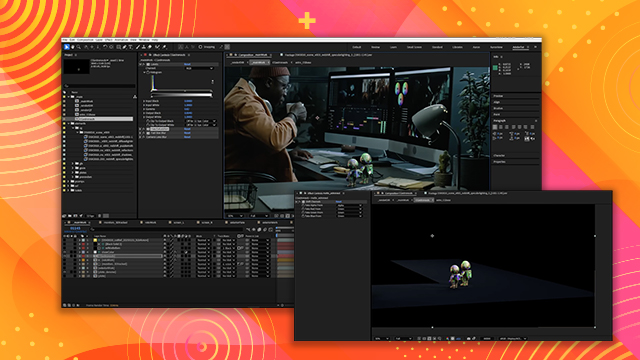
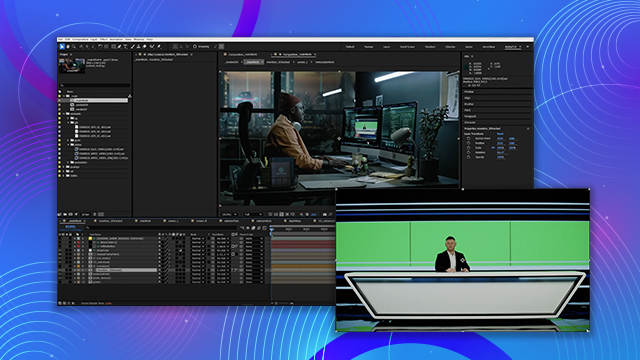
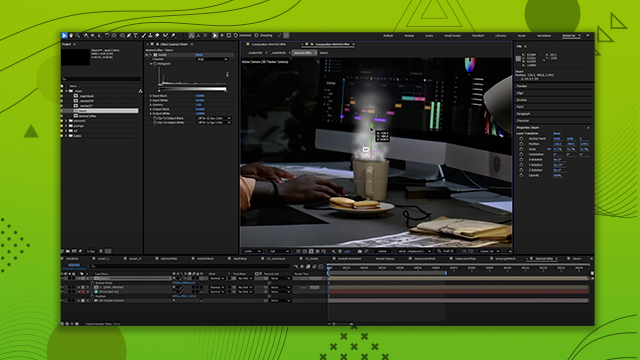
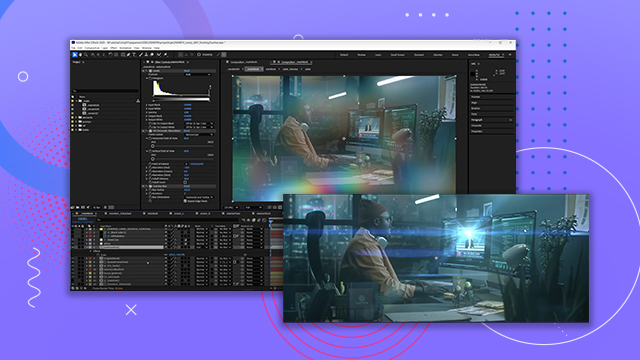
Composting graphics on a phone
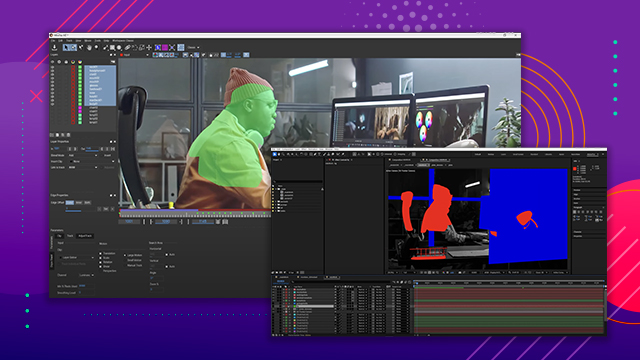
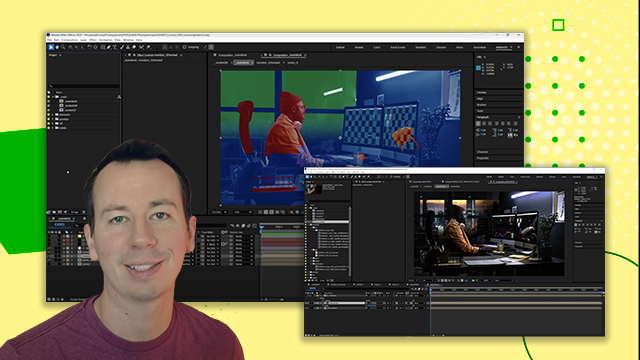
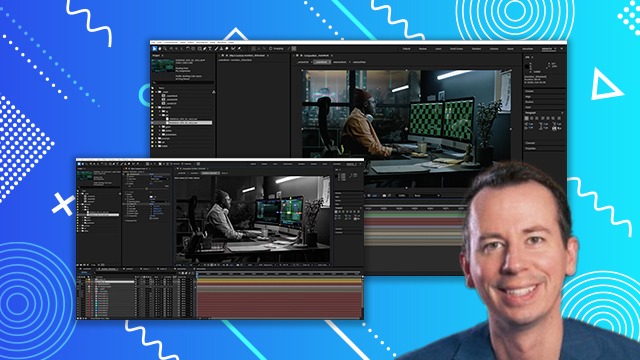
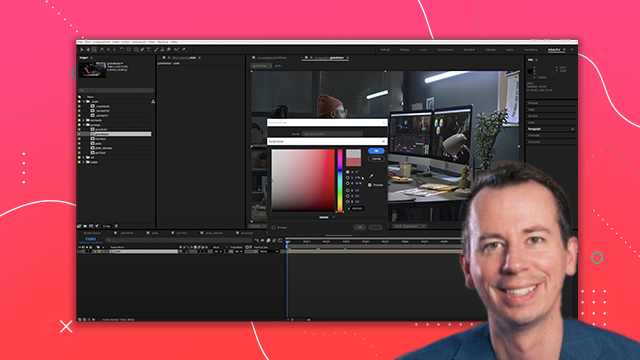
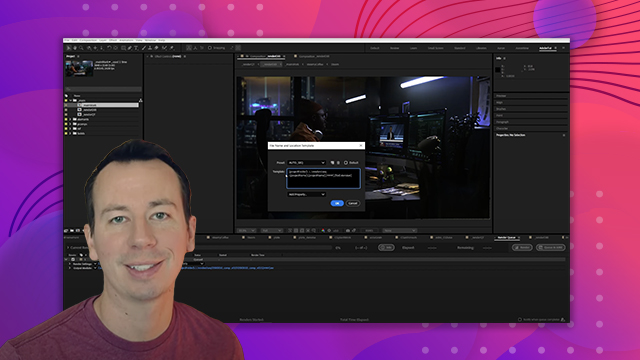
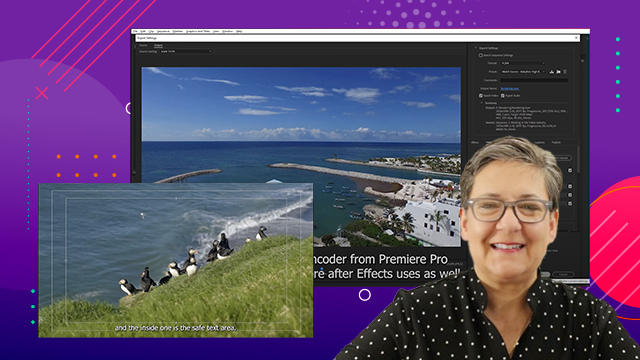
Tony Lupoi demonstrates compositing phone graphics in After Effects, covering grain removal, marker cleanup, and keying. He uses Mocha AE for planar tracking to accurately place graphics, then adds depth of field, color correction, and reflections before final QC.
This summary is AI generated
Learning Outcomes:
Learning outcomes not available.
Level: Advanced
Skills you'll gain:
Skills not available.
Key Insights
Key insights not available.
Did the AI summary help? Let us know.
Learning outcomes
Learning outcomes not available.
Key insights
Key insights not available.
Skills
Skills not available.
Transcript
[00:00:00] this is Tony lupoy from Cantina creative
[00:00:00] today we're going to dive into Adobe
[00:00:00] After Effects we're going to talk about
[00:00:00] taking your composits and visual effects
[00:00:00] to the next level let's go here's a
[00:00:00] sample shot that we can use for this
[00:00:00] demo let's go over the steps used to
[00:00:00] create this composite as you can see it
[00:00:00] is a pretty straightforward shot that
[00:00:00] you could complete quickly for your own
[00:00:00] project by following some simple steps
[00:00:00] however ever let's take this opportunity
[00:00:00] to explore Adobe After Effects in more
[00:00:00] depth I plan to use this setup here to
[00:00:00] highlight the capabilities of After
[00:00:00] Effects but to also mock up my workflow
[00:00:00] this is how I want to break down the
[00:00:00] scope of these tasks we want a pass of
[00:00:00] this plate that has been
[00:00:00] degrain I'm thinking for this shot I
[00:00:00] would love to have a pass of this
[00:00:00] without any tracking markers as it is
[00:00:00] pretty simple to track we don't really
[00:00:00] need them but we do now have to paint
[00:00:00] them all out and this will help bring
[00:00:00] back some details I like these in camera
[00:00:00] natural Reflections here let's make a
[00:00:00] note to ensure those are retained let's
[00:00:00] take some Liberties and drop a
[00:00:00] reflection up top here once we have a
[00:00:00] degrain clean plate let's go over a few
[00:00:00] Dill methods I'll will show you how this
[00:00:00] can help bring back details in the comp
[00:00:00] again maybe overkill for this but let's
[00:00:00] just do it I will want to build out a
[00:00:00] grain pass for the monitor Graphics we
[00:00:00] will want to track the shot build a mat
[00:00:00] with a combination of keys and Roto
[00:00:00] shapes composite the graphics into the
[00:00:00] shot then QC the shot against the
[00:00:00] original plate to look for areas we can
[00:00:00] approve on we are working in Adobe After
[00:00:00] Effects version
[00:00:00] 25.1 open color IO will assist us in
[00:00:00] managing our Asus color workflow I'll
[00:00:00] select the latest Asus
[00:00:00] profile a comprehensive profile that
[00:00:00] includes many of the settings I commonly
[00:00:00] use for this tutorial we will be
[00:00:00] compositing our shot in linear
[00:00:00] environment our working color space will
[00:00:00] be Asus CG we've selected this default
[00:00:00] display L that will allow me to view my
[00:00:00] linear Asus CG comp on my srgb monitor
[00:00:00] however if you're working on a show with
[00:00:00] a specific Show color we could turn off
[00:00:00] the default display L and we can toggle
[00:00:00] It To None then we could float a custom
[00:00:00] display L over the footage using an
[00:00:00] adjustment layer these are two methods
[00:00:00] that you can use to view your comps
[00:00:00] under a display light so let's go ahead
[00:00:00] and import our
[00:00:00] footage we know our footage is in Asus
[00:00:00] CG so let's update this for a seamless
[00:00:00] color space environment everything for
[00:00:00] this demo will be an Asus CG we can make
[00:00:00] a new comp I have gotten in the habit of
[00:00:00] ensuring that the first frame of the
[00:00:00] comp matches the first frame of the
[00:00:00] sequence
[00:00:00] okay so this will be our plate comp
[00:00:00] let's incorporate that into our main
[00:00:00] composition returning to our display L
[00:00:00] we can either work with an approved
[00:00:00] specific showl that operates as an
[00:00:00] adjustment layer over the
[00:00:00] composition or we can use Adobe After
[00:00:00] Effects default built-in display L for a
[00:00:00] quick temporary
[00:00:00] display we can duplicate our plate for
[00:00:00] future reference this is Handy to
[00:00:00] compare any frame in the comp to the
[00:00:00] main plate really quickly
[00:00:00] here okay let's tackle the degrain
[00:00:00] process something that we can plan to
[00:00:00] bake
[00:00:00] out my favorite way to degrain is using
[00:00:00] neat
[00:00:00] video reduced noise does a phenomenal
[00:00:00] job of building out a
[00:00:00] profile we can review the results inside
[00:00:00] of neat video or check it out here via
[00:00:00] the blue Channel
[00:00:00] let's update the comp frame range so
[00:00:00] that all the comps and the file frame
[00:00:00] numbers are all synced up we will need
[00:00:00] to render the degrain plate and bring it
[00:00:00] back in bake it out I will render it as
[00:00:00] an openexr file using pis compression we
[00:00:00] need to set up our output to render in
[00:00:00] the correct color space which is AC
[00:00:00] CG generally I bake out my degrain
[00:00:00] because the reduced noise function can
[00:00:00] be computationally heavy
[00:00:00] I will use this degrain plate for
[00:00:00] tracking and painting I might use it
[00:00:00] multiple times in the composition
[00:00:00] avoiding the need to process live noise
[00:00:00] reduction for each frame is something
[00:00:00] that we can
[00:00:00] optimize now let's bring the render back
[00:00:00] in and ensure that we change the default
[00:00:00] import color space from Asus 2065 to
[00:00:00] Asus
[00:00:00] CG let's swap our degrain pass back into
[00:00:00] the comp to replace the live degrain
[00:00:00] process
[00:00:00] not sure if you can see the reduced
[00:00:00] noise over the video here I'm just
[00:00:00] checking to see if it is a on toone swap
[00:00:00] out and double-checking the grain
[00:00:00] structure and looking for any updates
[00:00:00] required okay next we will need to build
[00:00:00] out a Clean Plate the idea behind why we
[00:00:00] would do this and not just leave the
[00:00:00] markers there and cover them up with the
[00:00:00] main Graphics using a clean plate with
[00:00:00] painted out markers provides the
[00:00:00] flexibility to composite the graphics in
[00:00:00] while allowing The Clean Plate to blend
[00:00:00] and mix with this element this technique
[00:00:00] enhances the integration of the monitor
[00:00:00] graphics compared to using fully opaque
[00:00:00] Graphics covering up the markers if we
[00:00:00] can successfully implement this here it
[00:00:00] will enable us to utilize small details
[00:00:00] from the original plate these methods
[00:00:00] can make a significant difference in the
[00:00:00] long run for this demonstration I would
[00:00:00] like to explore a few different
[00:00:00] approaches here we can consider using
[00:00:00] adobe's content aware particularly since
[00:00:00] the top tracking markers are good
[00:00:00] candidates they do not intersect with
[00:00:00] the foreground
[00:00:00] hand let's start by creating a garbage
[00:00:00] mat for the top tracking markers we
[00:00:00] should consider tracking this mat to the
[00:00:00] phone as the tracking data could be
[00:00:00] useful for multiple
[00:00:00] tasks I will create a large tracking
[00:00:00] area with plenty of clean tracks to
[00:00:00] follow here in mocha
[00:00:00] once we track this we can parent it to a
[00:00:00] null object allowing us to use the
[00:00:00] tracking data for any future tasks that
[00:00:00] may arise
[00:00:00] [Music]
[00:00:00] now we can create our splines with
[00:00:00] minimal key
[00:00:00] [Music]
[00:00:00] frames now with content aware we are
[00:00:00] simply going to punch a hole through the
[00:00:00] alpha using a stencil composite
[00:00:00] mode then we can generate a fill pass
[00:00:00] and see what magic comes out of this
[00:00:00] black box
[00:00:00] here regarding the tracking markers at
[00:00:00] the bottom of the screen we notice that
[00:00:00] they intersect with the foreground hand
[00:00:00] content aware may not yield the best
[00:00:00] results in this situation however there
[00:00:00] are areas in the bottom half that are
[00:00:00] free of the hands
[00:00:00] interference we could consider a hybrid
[00:00:00] approach using adobe's content aware to
[00:00:00] remove the markers initially and then
[00:00:00] implementing a manual Roto paint
[00:00:00] workflow once we address the sections
[00:00:00] where the hands overlap with the
[00:00:00] tracking markers
[00:00:00] for this I'm going to create a reference
[00:00:00] frame in
[00:00:00] Photoshop I find the paint tools are
[00:00:00] more Dynamic and the link between the
[00:00:00] two apps is fairly
[00:00:00] seamless I would however always
[00:00:00] recommend reloading your reference frame
[00:00:00] in After Effects to avoid waiting for
[00:00:00] the app to cash
[00:00:00] now let's discuss what to do when the
[00:00:00] hands cross over our tracking markers we
[00:00:00] will need to Roto the hand over the
[00:00:00] patches we create additionally we can
[00:00:00] explore another method that involves
[00:00:00] painting out sections of the tracking
[00:00:00] marker on frames that change
[00:00:00] significantly from one frame to another
[00:00:00] this approach will help us avoid paint
[00:00:00] chatter in this case I believe we can
[00:00:00] successfully implement
[00:00:00] it let me show you a test here where I
[00:00:00] masked out the tracking markers and
[00:00:00] created multiple versions using content
[00:00:00] to Weare as you can see it's important
[00:00:00] to understand different approaches to
[00:00:00] accomplish a single
[00:00:00] [Music]
[00:00:00] task when our fingers cross over the
[00:00:00] tracking markers we can create a freeze
[00:00:00] frame of a clean section of the screen
[00:00:00] to use as a patch however instead of
[00:00:00] making a freeze frame I plan to use a
[00:00:00] section of the live footage as a patch
[00:00:00] this way we can preserve the original
[00:00:00] Rin and subtle lighting changes it's
[00:00:00] just an idea we can experiment with
[00:00:00] here let's create an outer spline that
[00:00:00] remains static to Hive the movement of
[00:00:00] the Mask
[00:00:00] I prefer using Photoshop and their paint
[00:00:00] tools let's paint these couple of frames
[00:00:00] in Photoshop an easy way to switch
[00:00:00] between tasks is by using the content
[00:00:00] aware reference workflow however we
[00:00:00] won't be generating any fill layers we
[00:00:00] will simply use the reference frame
[00:00:00] option to quickly paint individual
[00:00:00] frames instead of relying on after
[00:00:00] effects as paint tools
[00:00:00] [Music]
[00:00:00] we can refine a few edges and paintt out
[00:00:00] any small
[00:00:00] overlaps sometimes you may need to paint
[00:00:00] back motion blur or Optical fallof that
[00:00:00] gets
[00:00:00] compromised now let's go to work on all
[00:00:00] the edges with our paint
[00:00:00] [Music]
[00:00:00] tools the process of finalizing work on
[00:00:00] features can often be quite meticulous I
[00:00:00] hope this provides some insight into
[00:00:00] this process while you can practice
[00:00:00] quickly turning around comps that are
[00:00:00] sufficient it's also beneficial to take
[00:00:00] the time to create a fully refined and
[00:00:00] Polished version after we finish this
[00:00:00] today there may still be rounds of
[00:00:00] revisions as we identify additional
[00:00:00] refinements and incorporate feedback
[00:00:00] what we have here is more of a version
[00:00:00] one
[00:00:00] you know finding the balance between
[00:00:00] Perfection and completion can be
[00:00:00] subjective which requires patience
[00:00:00] experience and the ability to try
[00:00:00] different options as you navigate
[00:00:00] different
[00:00:00] projects and this option we are using
[00:00:00] here reveals some unwanted tracking
[00:00:00] marker edges let's refine this mat and
[00:00:00] improve this
[00:00:00] solution once I have this clean plate in
[00:00:00] good shape we can kick this out as a
[00:00:00] Clean Plate pass I will use multiple
[00:00:00] instances of this and we can optimize
[00:00:00] how much computational effort is
[00:00:00] required by baking This Clean Plate
[00:00:00] out so again let's render this out in
[00:00:00] Asus CG and import it back in and
[00:00:00] interpolate it as Asus
[00:00:00] CG the live comp will still be available
[00:00:00] for
[00:00:00] updates after bringing it back in we can
[00:00:00] do a quick AB comparison this baked out
[00:00:00] plate will be positioned at the top of
[00:00:00] the comp if we need to go back and
[00:00:00] update The Clean Plate we can repeat the
[00:00:00] process to keep things streamlined and
[00:00:00] tidy so as a recap reintroducing This
[00:00:00] Clean Plate will Aid in bringing back
[00:00:00] small details and help seat this graphic
[00:00:00] into the monitor or the phone but to
[00:00:00] make this work we will need to address
[00:00:00] the green screen I can show you a few
[00:00:00] different methods we can explore for
[00:00:00] your own
[00:00:00] projects I am kind of guilty of never
[00:00:00] using spill suppressor as I get mixed
[00:00:00] results but it could work for
[00:00:00] you next let's use the advanced spill
[00:00:00] suppression we are already getting
[00:00:00] better results here we can see this
[00:00:00] method leans into a warm
[00:00:00] Tone If that is desired but this is
[00:00:00] looking much
[00:00:00] better as a third option let's consider
[00:00:00] desaturating the green that falls within
[00:00:00] a certain range we can apply frof curves
[00:00:00] fre
[00:00:00] Loof we can change the saturation based
[00:00:00] on the Hue let's adjust the fall off
[00:00:00] here
[00:00:00] to help the graphics stand out more
[00:00:00] clearly curves can also help reduce the
[00:00:00] screen brightness however it's important
[00:00:00] to be cautious when darkening the screen
[00:00:00] to avoid losing detail on the edges as
[00:00:00] there is a limit to how much you can
[00:00:00] adjust the brightness without affecting
[00:00:00] the overall quality this last method I
[00:00:00] will discuss is less common and requires
[00:00:00] some setup it has been useful for me
[00:00:00] let's go over this together so you can
[00:00:00] try it
[00:00:00] out this will require two copies of your
[00:00:00] footage with an option for a third
[00:00:00] duplicate that can be used at the end to
[00:00:00] darken your screen if desired I'll show
[00:00:00] you that in a
[00:00:00] sec I found that working in log for this
[00:00:00] Dill method allows for the best results
[00:00:00] let's first color transform this comp
[00:00:00] into ay
[00:00:00] log next apply key light and Sample the
[00:00:00] color you want to suppress we can now
[00:00:00] toggle our view to corrected
[00:00:00] Source back in our comp the layer that
[00:00:00] contains key light we change the
[00:00:00] composite mode to color jump out of this
[00:00:00] precom and apply a color transform to
[00:00:00] reverse the log footage back into Asus
[00:00:00] CG you can compare these three methods
[00:00:00] against each other and maybe one day
[00:00:00] this will come in handy for
[00:00:00] [Music]
[00:00:00] you key light does offer some options
[00:00:00] available to tweak the mat that you are
[00:00:00] driving the D spill
[00:00:00] with and if you want to darken the
[00:00:00] screen a little bit you can duplicate
[00:00:00] the key light layer that is in in the
[00:00:00] color mode right now duplicate it now
[00:00:00] change the layer mode from color to
[00:00:00] normal and mix it back in at a low
[00:00:00] opacity so the sampled areas are no
[00:00:00] longer as bright you can pull it down by
[00:00:00] using your
[00:00:00] opacity so now that we've explored these
[00:00:00] different methods of Dill each with
[00:00:00] their own advantages how about we
[00:00:00] precompose them all together in a single
[00:00:00] Dill pre
[00:00:00] which will allow us to blend three
[00:00:00] methods Al together we can use all these
[00:00:00] different methods in combination to come
[00:00:00] up with some desirable hybrid
[00:00:00] result I find that is always helpful to
[00:00:00] have your QC plate available to AB your
[00:00:00] results while you assess your
[00:00:00] composition along the
[00:00:00] [Music]
[00:00:00] way let's explore what approach we can
[00:00:00] take to track this phone mocha can
[00:00:00] handle this level of tracking quite
[00:00:00] easily but I want to highlight two
[00:00:00] important aspects first it's essential
[00:00:00] to understand holdout mats in mocha
[00:00:00] second I want to show you how to refine
[00:00:00] your track in After Effects using
[00:00:00] Expressions which will allow us to
[00:00:00] fine-tune the tracking even
[00:00:00] further first let me show you why we
[00:00:00] need to create holdout mats for mocha
[00:00:00] here's an example of what we should
[00:00:00] avoid in this case the foreground hand
[00:00:00] is not matted out correctly resulting in
[00:00:00] a track that's trying to do a planer
[00:00:00] object track however we have not
[00:00:00] isolated the planer surface of the
[00:00:00] phone now let's create a holdout mat for
[00:00:00] the foreground hand a rough garbage mat
[00:00:00] will suffice for this
[00:00:00] scenario with the garbage mat on top of
[00:00:00] our layer hierarchy we can begin to
[00:00:00] create a plane around the phone itself
[00:00:00] I may possibly add a track around the
[00:00:00] visible markers as well again just make
[00:00:00] sure the garbage mat is over top of this
[00:00:00] tracking
[00:00:00] spline you should have the layers
[00:00:00] visibility on
[00:00:00] also two features that you might find
[00:00:00] useful here are the quick stabilization
[00:00:00] feature and the option to toggle
[00:00:00] overlays on and off these features are
[00:00:00] primarily for reviewing your track here
[00:00:00] in mocha with the stabilization applied
[00:00:00] you'll have a better chance of noticing
[00:00:00] any slips that can be refined this is an
[00:00:00] excellent tool for reviewing your tracks
[00:00:00] here in mocha so let's insert our
[00:00:00] graphic into the shot I have a pre-built
[00:00:00] graphic pre-m that I've already
[00:00:00] animated now let's discuss how to merge
[00:00:00] this with our mocha track
[00:00:00] to do this properly we should place the
[00:00:00] graphic into a pre-m that is scaled to
[00:00:00] the size of the main composition this
[00:00:00] approach is necessary unless we have
[00:00:00] created a reference frame back in mocha
[00:00:00] let's proceed with this method we need
[00:00:00] to ensure that the graphic fits the
[00:00:00] overall size of the composition a
[00:00:00] convenient shortcut for this operation
[00:00:00] is control alt F which does a Fit to
[00:00:00] fill
[00:00:00] [Music]
[00:00:00] to review your track it's helpful to add
[00:00:00] a checkerboard overlay to see how the in
[00:00:00] camera tracking markers align with the
[00:00:00] checkerboard throughout the
[00:00:00] track so far nothing is jumping out at
[00:00:00] me with this track so let's keep going
[00:00:00] it is a good habit to label your comps
[00:00:00] as you work even if you have to go back
[00:00:00] and rename items while we are here I
[00:00:00] know I will want to add a color grade to
[00:00:00] cool the graphics down I'll also be
[00:00:00] adding Optical fall off to mimic the
[00:00:00] depth of field that we see in the shot
[00:00:00] we can Circle back to doing this but I
[00:00:00] wanted to get these empty adjustment
[00:00:00] layers in there for now let's refine the
[00:00:00] corner pin data while we can make small
[00:00:00] adust adjustments in mocha using the
[00:00:00] adjust track feature which is a solid
[00:00:00] approach I want to demonstrate how to
[00:00:00] parent your track to a secondary corner
[00:00:00] pin in After Effects this technique will
[00:00:00] allow you to make additional refinements
[00:00:00] without needing to return to
[00:00:00] mocha so to do this I'm going to apply a
[00:00:00] cc Power Pin and parent it to the
[00:00:00] original corner pin data that mocha
[00:00:00] exported before we parent anything we
[00:00:00] need to reset all the coordinates of the
[00:00:00] secondary corner pin and I can keep that
[00:00:00] effect turned off for now now let's
[00:00:00] match each coordinate each point to its
[00:00:00] corresponding coordinate in the other
[00:00:00] corner pin we have aligned these points
[00:00:00] and we need to make sure that the effect
[00:00:00] is still off so what makes this special
[00:00:00] here is that we're going to Simply add a
[00:00:00] plus value to the end of each line here
[00:00:00] this will instruct the corner pin to
[00:00:00] follow the parent in addition to any
[00:00:00] values I add in this secondary pin this
[00:00:00] method allows us to create effective
[00:00:00] compound refinements we cannot have both
[00:00:00] Corner pins activated at the same time
[00:00:00] so let's turn off this first corner pin
[00:00:00] and then enable our CC corner pin which
[00:00:00] should yield identical results here this
[00:00:00] method allows us to add Uber key frames
[00:00:00] which is extremely helpful when working
[00:00:00] with corner pin data exported from mocha
[00:00:00] as it applies a key frame to every frame
[00:00:00] in your
[00:00:00] timeline I'm exaggerating these new
[00:00:00] coordinates so you can clearly see the
[00:00:00] movement and also note that it does not
[00:00:00] snap back when we go to the next frame
[00:00:00] we have two corner pin coordinates that
[00:00:00] are working together giving us much more
[00:00:00] flexibility with in After Effects to
[00:00:00] refine the mocha corner pin
[00:00:00] results so the next step would be to mat
[00:00:00] out this foreground hand this will also
[00:00:00] allow us to see the track a little
[00:00:00] better once we get this hand matted out
[00:00:00] we've already created a clean plate so
[00:00:00] when we go to key this we will not have
[00:00:00] to deal with tracking markers in the way
[00:00:00] or anything like that let's have the key
[00:00:00] work just the hand but we can go Roto
[00:00:00] the finger and any other details we want
[00:00:00] to use I'm going to do this to avoid
[00:00:00] crunching the key too much and also just
[00:00:00] to show how we can combine two matting
[00:00:00] techniques together you don't always
[00:00:00] have to make it all fit with one key you
[00:00:00] can use additional mats as well so once
[00:00:00] we have a basic key and Roto out all the
[00:00:00] small details I want to encourage you to
[00:00:00] use this key layer as your main mat you
[00:00:00] can now take your D spill pre-m and mat
[00:00:00] that that over so that you ensure there
[00:00:00] is no green spill from your keyed
[00:00:00] footage you separate these two
[00:00:00] operations jumping back into our main
[00:00:00] comp we can adjust the gamma of our
[00:00:00] Graphics when working in linear you can
[00:00:00] interpret your srgb graphics to be srgb
[00:00:00] or preserve RGB in this specific case
[00:00:00] I'm going to adjust them here in comp
[00:00:00] with a gamma adjustment and a quick
[00:00:00] datat before we begin integration let's
[00:00:00] revisit our depth of field looking at
[00:00:00] our plate we can observe the falloff and
[00:00:00] the depth of field that we need to match
[00:00:00] to now let's apply the depth of field
[00:00:00] within our graphic precom the background
[00:00:00] plate serves merely as a guide layer any
[00:00:00] blur plug-in that allows you to use a
[00:00:00] blur map will work perfectly for this I
[00:00:00] can increase this value so that you can
[00:00:00] see the overall blur without any depth
[00:00:00] mat applyed
[00:00:00] now let's create a solid and add a
[00:00:00] gradient to
[00:00:00] it and this is how we'll build out our
[00:00:00] depth
[00:00:00] mat we'll need to pre-m this map and I
[00:00:00] prefer to place it at the bottom of our
[00:00:00] layer stack to just be
[00:00:00] tidy if I increase the value again you
[00:00:00] will see how the ramp is
[00:00:00] functioning let me exaggerate this map
[00:00:00] even further for
[00:00:00] clarity now let's pull this back to a
[00:00:00] more reasonable
[00:00:00] [Music]
[00:00:00] value so when we're keying sometimes you
[00:00:00] are left with needing to rework the
[00:00:00] edges for a shot like this you should
[00:00:00] not need to rely on a key to work the
[00:00:00] inner sides of this phone we can build
[00:00:00] our own mat for the phone edges being
[00:00:00] that is such a basic shape we can use
[00:00:00] the mat the key creates only around the
[00:00:00] hand and we can mat out the remaining
[00:00:00] areas with a
[00:00:00] mask while we are talking about edges
[00:00:00] let's build out an edge mat to darken
[00:00:00] the sides and seat them back
[00:00:00] in we can do this with an inner eroded
[00:00:00] mat from the graphics
[00:00:00] pre-m and mat that against the original
[00:00:00] mat combining these together will give
[00:00:00] us that Outer Edge to help Drive the
[00:00:00] color correction
[00:00:00] we can darken the edges so that they're
[00:00:00] not jumping out at us so
[00:00:00] much and let's soften this mat to take
[00:00:00] away any harsh
[00:00:00] edges we can always go back to our track
[00:00:00] and pull the edges out a few pixels to
[00:00:00] overlap one or two pixels with the outer
[00:00:00] frame we could darken the gray values in
[00:00:00] our background Graphics regarding
[00:00:00] integration if our blacks and Graphics
[00:00:00] appear too Punchy or dense we can revert
[00:00:00] to our reliable Clean Plate by
[00:00:00] overlaying This Clean Plate on top of
[00:00:00] the shot and mixing it back in we're not
[00:00:00] only lifting the blacks but also
[00:00:00] recovering any details in the edges that
[00:00:00] may have been lost during the King
[00:00:00] process this adjustment is subtle but it
[00:00:00] can be beneficial if you want to control
[00:00:00] how much lift over your graphics there
[00:00:00] are this is a great way to just mix it
[00:00:00] all back looking at this I do want to
[00:00:00] refine these edges still rework the key
[00:00:00] a bit and Roto some edges back in I will
[00:00:00] get to that shortly but for now we can
[00:00:00] move along how about we discuss adding
[00:00:00] some reflection to the shot I receive
[00:00:00] this request all the time whether it's
[00:00:00] for a like a matte non-reflective screen
[00:00:00] surface or phone that just doesn't pick
[00:00:00] up any Reflections in camera many people
[00:00:00] like to incorporate a reflective element
[00:00:00] to enhance the feel of the glass here's
[00:00:00] what we can do we can invert the
[00:00:00] tracking data for our reflection element
[00:00:00] so that it has a counter
[00:00:00] movement as if the light is refracting
[00:00:00] at an angle from the phone it's a bit of
[00:00:00] an optical trick but I do encourage you
[00:00:00] to try it out with one of your shots and
[00:00:00] see if it works for you let's use our
[00:00:00] existing mocha track we already did here
[00:00:00] [Music]
[00:00:00] we can grab the transform data rather
[00:00:00] than the corner pin data we can apply
[00:00:00] this data to our
[00:00:00] [Music]
[00:00:00] null I tend to consider this at planer
[00:00:00] Point track so I label it for quick
[00:00:00] reference this
[00:00:00] way we're going to use a still of some
[00:00:00] glass we shot to get some nice bokeh I
[00:00:00] want to mask out an area that has some
[00:00:00] falloff to it I will parent The Anchor
[00:00:00] Point of my reflection to the position
[00:00:00] of the
[00:00:00] track if the position data moves 10
[00:00:00] pixels to the left on the xaxis the
[00:00:00] element will move 10 pixels to the right
[00:00:00] on the xaxis we can position the element
[00:00:00] as needed and adjust its location to our
[00:00:00] preference to better visualize this I
[00:00:00] can add a solid layer to see how it
[00:00:00] interacts with the movement
[00:00:00] [Music]
[00:00:00] now fine tune it to your
[00:00:00] liking remember less is often more
[00:00:00] you'll be able to see and feel the
[00:00:00] effect this is how you can create a
[00:00:00] reflection when necessary it's
[00:00:00] definitely worth trying out so one last
[00:00:00] reflection this is the one that we can
[00:00:00] take from the plate let's grab our Clean
[00:00:00] dilled Plate and we already have a track
[00:00:00] so I can grab that as
[00:00:00] well let's set up a mat to help us
[00:00:00] isolate the reflection of the finger
[00:00:00] over the
[00:00:00] [Music]
[00:00:00] phone we can create a contrast curve to
[00:00:00] try to separate the Reflection from the
[00:00:00] plate
[00:00:00] [Music]
[00:00:00] [Music]
[00:00:00] here we can drop the reflection under
[00:00:00] the foreground
[00:00:00] hand and kill the
[00:00:00] [Music]
[00:00:00] color the extreme contrast curve here in
[00:00:00] a linear workflow will get us into
[00:00:00] negative value vales which we want to
[00:00:00] steer clear of so if we apply some
[00:00:00] levels here we can clamp the values of
[00:00:00] these Reflections to prevent the black
[00:00:00] levels from getting away from us we can
[00:00:00] soften the reflection to avoid any harsh
[00:00:00] noise if
[00:00:00] needed then we can add it back in and
[00:00:00] reduce the intensity of this reflection
[00:00:00] here together we've explored several
[00:00:00] methods and after effects to en enance
[00:00:00] your compositing workflow I hope you
[00:00:00] have found these strategies useful there
[00:00:00] are so many great Tools in After Effects
[00:00:00] to share and I wish you the best of luck
[00:00:00] in your VFX projects this is Tony lupoy
[00:00:00] and happy renders
[00:00:00] [Music]