
Working with 3D Models
Import 3D models and animate them to produce commercials, social media graphics and more.
This summary is AI generated
Learning Outcomes:
- Import 3D models into After Effects.
- Optimize settings for fast playback.
- Adjust lighting and shadows for realism.
Level: Advanced
Skills you'll gain:
After Effects, 3D Modeling, Animation, Lighting
Key Insights
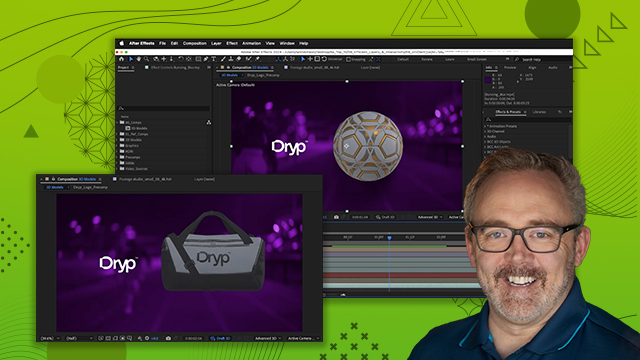
- Supported 3D model formats include glb, gltf, and obj.
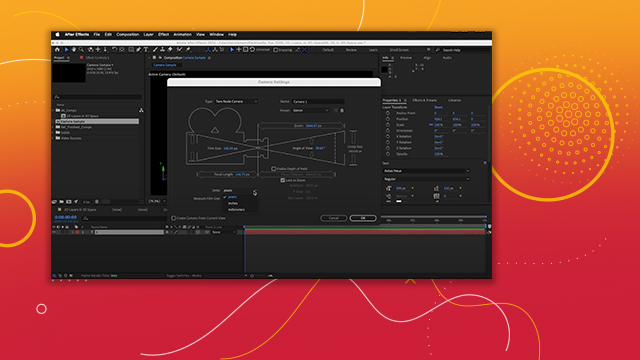
- Use the model settings dialog to adjust scale and position.
- Enable 3D for layers to interact with 3D models.
- Utilize environment lights for realistic lighting effects.
- Adjust render quality settings for better performance.
- Use calculations to apply effects to 3D models indirectly.
- Draft 3D mode can speed up playback but disables shadows.
- Ensure shadow catchers extend to the edges of compositions.
- Animation options are available for 3D models with animations.
- Maintain a clean layer stack for better organization.
Did the AI summary help? Let us know.
Learning outcomes
- Import 3D models into After Effects.
- Optimize settings for fast playback.
- Adjust lighting and shadows for realism.
Key insights
- Supported 3D model formats include glb, gltf, and obj.
- Use the model settings dialog to adjust scale and position.
- Enable 3D for layers to interact with 3D models.
- Utilize environment lights for realistic lighting effects.
- Adjust render quality settings for better performance.
- Use calculations to apply effects to 3D models indirectly.
- Draft 3D mode can speed up playback but disables shadows.
- Ensure shadow catchers extend to the edges of compositions.
- Animation options are available for 3D models with animations.
- Maintain a clean layer stack for better organization.
Skills
After Effects, 3D Modeling, Animation, Lighting
Transcript
[00:00:00] you can import three different kinds of
[00:00:02] 3D models into after effects for use in
[00:00:04] your
[00:00:05] compositions those file formats are glb
[00:00:09] gltf and
[00:00:11] obj now the project we're going to work
[00:00:14] on will contain GB files and I'll show
[00:00:18] you how to import those files how to
[00:00:20] optimize your settings for fast playback
[00:00:23] and how to get back to those settings if
[00:00:26] you change your mind in terms of how
[00:00:28] that file is interpreted
[00:00:30] let's go ahead and get
[00:00:32] started now if you look at our project I
[00:00:34] already have a background and if I scrub
[00:00:36] my current time indicator you'll see I
[00:00:39] have a logo and I want to add 3D models
[00:00:42] to the right side of this which we will
[00:00:44] then animate in a little bit but first
[00:00:47] let's add the models go to the project
[00:00:50] panel open the 3D models folder and in
[00:00:53] here we have three models I'm going to
[00:00:55] start with the sports watch and I'll
[00:00:57] just drag it and drop it to the top of
[00:00:59] my layer stack and when I let go you'll
[00:01:01] get this model settings dialogue if you
[00:01:04] don't get this ever maybe you've already
[00:01:07] added this models to your project at
[00:01:09] least once uh but I'll show you how to
[00:01:11] get this menu up again here in a little
[00:01:13] second now I can adjust the object scale
[00:01:17] I can set its model units which is
[00:01:19] really helpful if you know what units
[00:01:22] were used to actually create the model
[00:01:25] in this instance I'm not sure so I'll
[00:01:27] just say meters and you could have have
[00:01:30] the object position while scaling um you
[00:01:33] want it to affect the position or do not
[00:01:35] affect the position I'll just leave that
[00:01:37] at its default settings and for the up
[00:01:40] Axis I have z and y and I'll leave that
[00:01:44] the way it is now keep in mind there is
[00:01:48] an option here to affect all layers that
[00:01:51] use this model if you're adding the same
[00:01:53] model more than once and you make
[00:01:56] changes in these model settings it will
[00:01:58] propagate those changes to the same
[00:02:00] model across all your different
[00:02:02] compositions if you have this selected
[00:02:05] all right so I'm going to leave this
[00:02:06] sports watch set up and I'll click okay
[00:02:10] and with it added into my project you
[00:02:13] can barely see what's going on so with
[00:02:17] layer one selected I'm going to press s
[00:02:19] for scale and you notice it bumped all
[00:02:22] the way down to one so I'm going to
[00:02:24] crank it up to like 50% and here you can
[00:02:27] see it's nice and large so I have by 3D
[00:02:30] Gizmo and the way this works is it's
[00:02:32] colorcoded X Y and Z red green and blue
[00:02:36] and if you hover over the little spheres
[00:02:39] that you see on the arked handles that
[00:02:42] will allow you to rotate the model
[00:02:43] around and if you hover over the arrow
[00:02:46] tips that will slide the model along
[00:02:49] whatever axis you are clicking and
[00:02:52] dragging
[00:02:54] on see we'll do that okay perfect now I
[00:02:58] want to go ahead and scale the down so I
[00:03:00] can just click and drag on the scale
[00:03:02] property here in the timeline and if I
[00:03:06] go to world mode I can just move this
[00:03:11] over to the right and not have to worry
[00:03:13] about how I have it oriented World
[00:03:16] access mode to be exact so once you've
[00:03:20] added a model into the project let's say
[00:03:21] you decide you need to change one of the
[00:03:23] settings well if you have it selected
[00:03:25] here in the timeline you can go up under
[00:03:27] layer and go to model settings and here
[00:03:30] you can make those changes okay there
[00:03:33] are some basic settings that you can set
[00:03:35] up as well but I usually just leave it
[00:03:38] as advanced and click okay now the 3D
[00:03:41] models are kind of neat because when you
[00:03:43] drag them in it's automatically going to
[00:03:46] make sure that your project is in the
[00:03:49] advanced 3D render now there are options
[00:03:53] for the advanced 3D renderer here I
[00:03:55] could set my render quality and I could
[00:03:58] set my resolution
[00:04:00] I usually leave mine set to full and my
[00:04:02] render quality set to eight but you can
[00:04:05] crank down the render quality if your
[00:04:07] system isn't moving quite fast enough as
[00:04:10] you are creating things another thing
[00:04:13] that you want to check out is the
[00:04:15] casting box size and the casting box
[00:04:17] center so if I say fit to scene it's
[00:04:19] going to
[00:04:20] recalculate the shadow casting based on
[00:04:24] the 3D that's in the entire project so
[00:04:27] when I said fit the scene now you can
[00:04:29] see where the shadow is going to be set
[00:04:31] up if I want to add a shadow and in fact
[00:04:34] I do so I'm going to click okay and I'll
[00:04:36] go up under layer and I'll choose a new
[00:04:39] light now I could choose a spot or a
[00:04:42] point light but if you notice I have
[00:04:44] five light options in this and that's
[00:04:48] due to the advanced 3D renderer I'm
[00:04:50] going to choose the environment light
[00:04:51] since I haven't shown you one of those
[00:04:53] before the intensity I'll leave up at
[00:04:55] 100 and I do want it to cast Shadows
[00:04:58] with 100% Darkness and I'll click okay
[00:05:01] now not much is going to happen because
[00:05:03] the environment light is looking for an
[00:05:05] environment to use as a light source and
[00:05:09] that would be an hdri image I just
[00:05:12] happen to have this HDR file that if I
[00:05:15] double click here you can see it's a
[00:05:17] studio and it's high dynamic range so
[00:05:20] it's going to use the luminance from
[00:05:21] this file to actually light the scene so
[00:05:24] I'll drag it and drop it to the timeline
[00:05:26] here and under my environment light in
[00:05:28] the timeline there is a source drop down
[00:05:31] set to default and I'll choose this
[00:05:33] studio small 8K so now we'll no longer
[00:05:37] see the studio visibly in the
[00:05:39] composition but you will notice that it
[00:05:42] has changed how the watch is lit if I
[00:05:45] toggle the environment light off and on
[00:05:48] you can see it's quite
[00:05:50] drastic and I want to make sure that I
[00:05:53] actually have something to catch Shadows
[00:05:55] so I need to make a new layer
[00:05:57] solid I'll make it the comp size and
[00:06:02] instead of making it white I'll make it
[00:06:04] kind of red so I can see this in a
[00:06:07] different light and when I click okay
[00:06:10] it's going to make a very bright red
[00:06:11] layer but I'll enable 3D on that
[00:06:15] layer and once I've done that it'll take
[00:06:18] a second to reender but once it does
[00:06:20] you'll see it is halfway through the
[00:06:23] model but I do have a slight Shadow here
[00:06:26] so I'm going to press P to open the
[00:06:28] position and I'll just move this back on
[00:06:30] the Z
[00:06:32] axxis and if it's taking a long time to
[00:06:36] adjust you can click on this drop down
[00:06:38] and set it to Auto when you set it to
[00:06:40] Auto what that does is makes the
[00:06:43] resolution drop down which is what this
[00:06:45] is adjust based on the magnification
[00:06:48] settings so if you notice our
[00:06:49] magnification isn't even 50% so when I
[00:06:53] change this to Auto it's going to change
[00:06:55] it to half which is actually going to
[00:06:57] increase the speed or the playback
[00:07:00] by four times because it's half as many
[00:07:02] pixels across and half as many pixels up
[00:07:05] and down and here you can see the
[00:07:07] Shadows that are actually being created
[00:07:10] on this layer solid and I'll just push
[00:07:15] this back a little bit more so it's not
[00:07:18] cutting off a section of the
[00:07:20] watch and then I want to change the
[00:07:24] material options so with layer one
[00:07:26] selected I'll press AA and that opens
[00:07:28] the material option options and for
[00:07:30] accept Shadows I'll change them from on
[00:07:33] to only so now we're only going to see
[00:07:36] the shadows in the scene and if I turn
[00:07:39] the environment light off and on you can
[00:07:42] see the difference in terms of what it
[00:07:45] looks like now what if I want to rotate
[00:07:48] the environment light well if I open up
[00:07:51] my options for the environment light and
[00:07:53] go to transform sure enough I can rotate
[00:07:56] things on the xaxis and when I do that
[00:07:59] it it'll rotate that whole environment
[00:08:01] which is going to change how things are
[00:08:04] highlighted and shadowed in the model if
[00:08:08] I rotate on the Y it's going to do a
[00:08:10] similar thing here notice when I rotate
[00:08:13] on the Y I'm seeing the edges of the
[00:08:16] Shadow catcher there when you create a
[00:08:19] shadow catcher it's probably smart to
[00:08:22] make sure that it goes all the way to
[00:08:23] the edge of your composition so even
[00:08:27] though I had to push it back and I can
[00:08:28] see the edge here I can just press as
[00:08:31] for scale and I can crank this up until
[00:08:33] it goes past the edges of the
[00:08:35] composition so now I've added a light to
[00:08:39] the scene and I've added shadows and of
[00:08:42] course in the environment light I can
[00:08:44] adjust the intensity so if I want to
[00:08:46] bring it down and not have it be quite
[00:08:48] so bright I can definitely do that but
[00:08:51] having added that light you'll notice I
[00:08:54] have a nice soft Shadow under there as
[00:08:57] opposed to no Shadow at all which which
[00:09:00] doesn't really help in the realism
[00:09:02] department so I can repeat this process
[00:09:04] for each individual model but the
[00:09:07] overarching idea is that you understand
[00:09:10] the process of adding a 3D model into
[00:09:12] your project and just so you know the
[00:09:14] models that are supported in After
[00:09:16] Effects if there are animations on the
[00:09:19] model you will see another section for
[00:09:22] animation options and you can control
[00:09:25] how that animation plays back now this
[00:09:27] model doesn't have any animation on it
[00:09:29] so I don't have that as an example but I
[00:09:33] can definitely rotate this position this
[00:09:36] key frame this just like any other 3D
[00:09:38] layer the only difference is this is
[00:09:41] actually 3D now the last thing you need
[00:09:44] to understand about 3D models is when
[00:09:48] they are selected if you go up under
[00:09:50] effect I can't apply any effects to the
[00:09:52] model so if I just did want to add like
[00:09:55] a random drop shadow and didn't want to
[00:09:57] have to create a shadow catcher in an
[00:09:59] environment light I couldn't just add
[00:10:02] like perspective drop shot unless I
[00:10:05] utilized another layer and that layer
[00:10:09] I'll just go up under layer and I'll
[00:10:11] make a new solid and for this solid I'll
[00:10:14] go ahead and make it white and I'll
[00:10:15] click okay and this solid I'll place at
[00:10:19] the top of the layer stack I'm going to
[00:10:20] use calculations so if I go to my
[00:10:23] effects and presets and search for
[00:10:25] calculations I can drag it and drop it
[00:10:27] on the solid and and I know some of you
[00:10:30] might be intimidated by calculations but
[00:10:32] I want to encourage you to not be okay
[00:10:35] what it allows you to do is take the
[00:10:36] pixels from one layer and use it on this
[00:10:40] layer which happens to be in 2D space
[00:10:42] okay so the layer Source or the second
[00:10:46] source that I want to use is on this
[00:10:50] dropdown this sportswatch glb layer oh
[00:10:54] second layer opacity yep I need to make
[00:10:56] sure the opacity is up at 100% And that
[00:10:59] will allow me to actually see the model
[00:11:02] now on this solid now of course if I go
[00:11:06] to my transparency it's no longer
[00:11:08] transparent so how do I get the
[00:11:10] transparency I have another calculation
[00:11:12] I'll just select that in the effect
[00:11:14] controls and press command D on the Mac
[00:11:16] or control D on Windows and for this one
[00:11:19] I want to go to the blending mode now
[00:11:21] when I come down to apply this I'll
[00:11:22] choose stencil Alpha and once I've
[00:11:25] chosen stencil Alpha you can see if I
[00:11:28] turn off the visibility of this glb I
[00:11:32] have the alpha channel of the watch so
[00:11:35] now I can apply effects so now that I
[00:11:38] see that I can come over to my effects
[00:11:40] and I could search for drop
[00:11:43] shadow and I could simply drag it and
[00:11:45] drop it right onto the white solid which
[00:11:49] has my
[00:11:51] calculations and there's my drop shadow
[00:11:54] it's applied the effect let me go ahead
[00:11:56] and increase the distance so we can
[00:11:58] actually see it and I can add the
[00:12:00] softness right onto that and now instead
[00:12:04] of having to worry about lighting it and
[00:12:06] creating a shadow catcher I just used
[00:12:09] calculations to move the pixels but if I
[00:12:13] want to actually rotate the watch I'll
[00:12:15] select the watch here and I'll press R
[00:12:18] and I can rotate it like so and as I
[00:12:21] rotate and animate the model the
[00:12:24] calculations will follow along with
[00:12:26] whatever changes I actually decide to do
[00:12:29] so it's going to take a second here to
[00:12:31] redraw because it's trying to draw
[00:12:34] everything now if you're noticing lag
[00:12:37] when you're working with the models you
[00:12:38] can enable draft 3D and that should
[00:12:40] speed things up a little bit just keep
[00:12:42] in mind when you do that it will disable
[00:12:44] things like Shadows created from the
[00:12:46] environment lights now I'll just turn
[00:12:48] off my calculations and turn on my
[00:12:50] sports watch because I like the drop
[00:12:52] shadow that's being created Naturally by
[00:12:54] the environment light I just wanted you
[00:12:56] to understand if you need to apply
[00:12:58] effects to a 3D model you can do so by
[00:13:01] creating a layer solid and then using
[00:13:04] calculations to apply those pixels onto
[00:13:07] the solid and then you can layer effects
[00:13:10] on top of that but effects are not
[00:13:12] supported being applied directly to 3D
[00:13:15] objects


 AdChoice