Home > Designing with Animation In Mind

Kyle Hamrick

Motion | Creative & Technical Direction

linkedin-icon

Designing with Animation In Mind

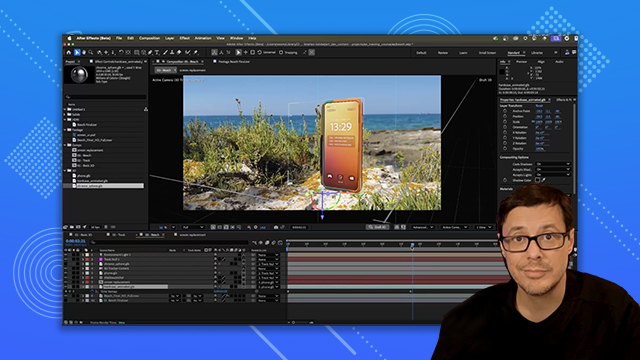
Create an animated logo from an imported Illustrator design, then apply a variety of techniques to create a complete motion graphic within After Effects.

This summary is AI generated

Learning Outcomes:

Learning outcomes not available.

Level: Beginner

Skills you'll gain:

Skills not available.

Key Insights

Key insights not available.

Learning outcomes

Learning outcomes not available.

Key insights

Key insights not available.

Skills

Skills not available.

Transcript

[00:00:00] hey Kyle here again introducing you to

[00:00:00] after effects if you're just starting

[00:00:00] here you might want to go back and watch

[00:00:00] the first video where we learned about

[00:00:00] the basics of After Effects how to

[00:00:00] create and work with key frames and we

[00:00:00] focused on animating using mostly the

[00:00:00] transform properties for our next steps

[00:00:00] we'll continue expanding on those same

[00:00:00] ideas but before we get back into After

[00:00:00] Effects I want to show you some

[00:00:00] important ideas about how to structure

[00:00:00] your designs to avoid creating a big

[00:00:00] mess for yourself later first things

[00:00:00] first After Effects uses the RGB color

[00:00:00] mode if you have designs built for cmk

[00:00:00] you'll need to convert those before you

[00:00:00] can import them into after effects in

[00:00:00] the world of video things are always

[00:00:00] measured in pixels and we're just

[00:00:00] working at screen resolution here so if

[00:00:00] you have files created at a higher DPI

[00:00:00] or PPI that doesn't really get you

[00:00:00] anything although it technically doesn't

[00:00:00] hurt either because pixels are pixels

[00:00:00] remember though since we'll be animating

[00:00:00] things and the scale of a layer can

[00:00:00] change over time you'll want to consider

[00:00:00] the maximum size you might want to see

[00:00:00] that element and maybe create a just a

[00:00:00] little bit bigger than that to give

[00:00:00] yourself some

[00:00:00] flexibility in general that flexibility

[00:00:00] is the thing you really want to keep in

[00:00:00] mind here because designing for

[00:00:00] animation is all about anticipating the

[00:00:00] ways you might want to move each

[00:00:00] particular element for example I'm here

[00:00:00] in Photoshop and I have this circle

[00:00:00] which needs some textured shading a lot

[00:00:00] of designers would select the circle

[00:00:00] create a new layer paint on that texture

[00:00:00] and then call it good but if we take a

[00:00:00] closer look at this texture layer oh

[00:00:00] yeah it only exists within that circle

[00:00:00] shape shape which means we can't animate

[00:00:00] this separately from the circle without

[00:00:00] seeing that edge just like the texture

[00:00:00] layer in our first example extended Way

[00:00:00] Beyond the edges of the canvas you need

[00:00:00] to think about the ways you might want

[00:00:00] to animate each layer or group of layers

[00:00:00] and so how much of that thing needs to

[00:00:00] exist I would structure my textured

[00:00:00] Circle more like this where we have two

[00:00:00] groups of individual brush Strokes each

[00:00:00] of them on their own separate layer and

[00:00:00] then those groups are masked so things

[00:00:00] look correct here in Photoshop in After

[00:00:00] Effects it gives you the flexibility to

[00:00:00] animate every single brush stroke

[00:00:00] individually if you want to and so that

[00:00:00] structuring that started in Photoshop is

[00:00:00] the difference between the circle on the

[00:00:00] left and the circle on the right and

[00:00:00] what a difference that makes huh while I

[00:00:00] don't have the time here to cover every

[00:00:00] single detail of building and importing

[00:00:00] in both Photoshop and illustrator here's

[00:00:00] a quick overview every Photoshop layer

[00:00:00] can become an After Effects layer groups

[00:00:00] will be imported as something called

[00:00:00] pre-positioned within another one as you

[00:00:00] just saw Photoshop text can be converted

[00:00:00] into editable After Effects text most

[00:00:00] layer Styles and some effects can

[00:00:00] actually stay editable and then be

[00:00:00] animated in After Effects I should point

[00:00:00] out that smart objects don't get any

[00:00:00] special functionality they're treated

[00:00:00] like any other Photoshop layer so if you

[00:00:00] want after effects to have access to

[00:00:00] those internal pieces you'll need to add

[00:00:00] them into your Photoshop file directly

[00:00:00] after effects also doesn't recognize

[00:00:00] Photoshop art boards so you'll need to

[00:00:00] split those into separate files before

[00:00:00] import for Illustrator files every top

[00:00:00] level layer can become an After Effects

[00:00:00] layer anything within that top level

[00:00:00] layer whether it's just one thing or

[00:00:00] hundreds of individual pieces will all

[00:00:00] be imported as a single layer

[00:00:00] illustrator layers can be converted into

[00:00:00] shape layers in After Effects which

[00:00:00] means you can actually edit and animate

[00:00:00] things like fill stroke and even the

[00:00:00] actual Vector paths illustrator text

[00:00:00] unfortunately can't be converted the way

[00:00:00] Photoshop text can but you can easily

[00:00:00] copy paste that text or even Vector

[00:00:00] elements between the two apps again

[00:00:00] after effects won't see multiple art

[00:00:00] boards so those need to be saved out as

[00:00:00] separate Illustrator files make sense

[00:00:00] good how about we dive into another

[00:00:00] example and put this stuff into practice

[00:00:00] we're here an illustrator looking at

[00:00:00] this logo for Bloom Bumble gum that's

[00:00:00] probably another one of our silly puns

[00:00:00] we'll see soon enough but the important

[00:00:00] thing is that each of these letters is

[00:00:00] its own layer here in illustrator see we

[00:00:00] have our b l o o m you get the idea and

[00:00:00] for these we just made the flowers one

[00:00:00] whole layer by itself because we don't

[00:00:00] really need to do any internal animation

[00:00:00] with these pieces we're just going to

[00:00:00] animate this as a single object here and

[00:00:00] so one layer is plenty this looks all

[00:00:00] ready to send over to After Effects so

[00:00:00] let's do that I'm here in a blank after

[00:00:00] effects project and to import that file

[00:00:00] I could also just grab it directly from

[00:00:00] my file browser here's that bloom logo

[00:00:00] AI file and you can just drag that

[00:00:00] directly into after effects if you don't

[00:00:00] want to use the other import dialogue

[00:00:00] like before we'll get a pop up here it's

[00:00:00] just a little bit different for an

[00:00:00] illustrator file but the options are

[00:00:00] pretty much the same you want to make

[00:00:00] sure you choose composition and then

[00:00:00] that this is set to layer size and then

[00:00:00] we'll hit okay once again we'll get a

[00:00:00] composition and a folder with some

[00:00:00] layers in it we can just double click

[00:00:00] that and this is the first time that

[00:00:00] we're working with a file that doesn't

[00:00:00] have a background layer so if you come

[00:00:00] down here you'll see that you can toggle

[00:00:00] your transparency grid if you'd like

[00:00:00] that but I'm going to work on black

[00:00:00] let's come up to our composition

[00:00:00] settings

[00:00:00] the name is fine I would like to change

[00:00:00] the height and width and a few other

[00:00:00] things here let's go ahead and uncheck

[00:00:00] this locked aspect ratio let's just make

[00:00:00] this a pretty big square at

[00:00:00] 2200 and you can hit tab to go to the

[00:00:00] next field

[00:00:00] 2200 and then we'll set our frame rate

[00:00:00] at

[00:00:00] 30 and let's go ahead and make this nice

[00:00:00] and long I don't think we'll need all of

[00:00:00] this but just to be safe let's set this

[00:00:00] to 20

[00:00:00] seconds if you'd like to change the

[00:00:00] background color you can do that here

[00:00:00] you could make it uh this fabulous Adobe

[00:00:00] red for example but I think I'll just

[00:00:00] leave it as black for now and then hit

[00:00:00] okay to zoom in and out of your timeline

[00:00:00] you can use the plus or minus Keys up at

[00:00:00] the top of your keyboard or you can also

[00:00:00] click and drag on this little slider

[00:00:00] down at the bottom of that panel now

[00:00:00] since I increased the duration of this

[00:00:00] composition I'll need to select all my

[00:00:00] layers and extend those out to the end

[00:00:00] of the timeline let's hop back to the

[00:00:00] beginning of our composition and just to

[00:00:00] do a little housekeeping let's select

[00:00:00] these first five layers and set those to

[00:00:00] oh maybe orange just so it's easier to

[00:00:00] see the difference between the two words

[00:00:00] here and I'll click down here to

[00:00:00] deselect the first animation I'll do is

[00:00:00] on our two flower layers so I'm going to

[00:00:00] go ahead and select both of these you

[00:00:00] can do it up here in the viewer as well

[00:00:00] and if you use shift or control you can

[00:00:00] select both of them I'll come over here

[00:00:00] and make a key frame on rotation and

[00:00:00] then jump to the end and maybe spin

[00:00:00] these up to about 90

[00:00:00] that's probably plenty do a quick

[00:00:00] preview okay that might be a little slow

[00:00:00] so let's jump back up here and with both

[00:00:00] of them still selected we could spend

[00:00:00] that up to about 180 maybe that's

[00:00:00] enough yeah we don't want them too fast

[00:00:00] just enough to uh show that they're

[00:00:00] moving although you know what looking at

[00:00:00] this I think it might be interesting if

[00:00:00] they were turning in different

[00:00:00] directions so let's stop our

[00:00:00] preview and we could select either one

[00:00:00] of these I think I'll take the top one

[00:00:00] if you click on the word rotation it

[00:00:00] will actually select all the key frames

[00:00:00] on that property and then if you

[00:00:00] rightclick on either of them you can

[00:00:00] choose right here key frame assistant

[00:00:00] time reverse key frames that'll just

[00:00:00] Swap all of these to go

[00:00:00] backwards and let's see how that

[00:00:00] feels okay I think that's a little more

[00:00:00] interesting now I'll create a scale

[00:00:00] animation for each of these letters to

[00:00:00] come on we'll start with the top word

[00:00:00] let's jump to our home point and we'll

[00:00:00] start with b right here I'll just work

[00:00:00] directly in the timeline this time so

[00:00:00] I'll hit s to reveal the scale property

[00:00:00] and let's go ahead and create a scale

[00:00:00] key frame here so if I hold shift and

[00:00:00] press page down one 2 three times I'll

[00:00:00] jump up to frame 30 or 1 second since

[00:00:00] we're in a 30 frame per second comp I'll

[00:00:00] go ahead and create another key frame up

[00:00:00] here and if I jump back to frame zero I

[00:00:00] actually want that scale to also be zero

[00:00:00] that'll give us this quick scaleup

[00:00:00] animation and that's okay but it could

[00:00:00] be more interesting what I'd like to do

[00:00:00] is come to frame 20 and actually create

[00:00:00] another key frame here that goes above

[00:00:00] 100 and then we settle back down to its

[00:00:00] actual size so let's come in here and

[00:00:00] type 110 on either of those fields hit

[00:00:00] home and then preview that okay

[00:00:00] better I'd like to smooth out these key

[00:00:00] frames just a little bit so I'm going to

[00:00:00] draw a box around all of them or again

[00:00:00] you could click on the word scale and

[00:00:00] again I'm going to rightclick one of

[00:00:00] these key frame assistant and then

[00:00:00] choose this option easy ease or you can

[00:00:00] just hit the F9 key which is probably

[00:00:00] what you'll want because this is a

[00:00:00] pretty common thing you'll see the shape

[00:00:00] of the key frame changes and if we watch

[00:00:00] this

[00:00:00] again Smooths everything out I'll talk

[00:00:00] more about that later but for now we'll

[00:00:00] just use that now I'm going to jump back

[00:00:00] to home select all of these and come up

[00:00:00] to edit copy or you can hit controller

[00:00:00] command

[00:00:00] C then I will select each of these

[00:00:00] orange layers you can do select label

[00:00:00] group or you could shift select

[00:00:00] them and then I'll come up to edit paste

[00:00:00] or controller command V and we'll paste

[00:00:00] that same key frame across all of these

[00:00:00] layers if we hit U we'll be able to see

[00:00:00] all of them plus those couple rotation

[00:00:00] key frames we made before so let's

[00:00:00] previe

[00:00:00] that okay nice and since that's the same

[00:00:00] property across all of these it worked

[00:00:00] to just copy paste all of them like we

[00:00:00] did in our first example I'd like to

[00:00:00] time offset these a little bit just to

[00:00:00] make this a little more interesting so

[00:00:00] let's come back to home we can hit plus

[00:00:00] to zoom in just a little bit let's move

[00:00:00] forward two frames using page down and

[00:00:00] then we'll grab this layer and just bump

[00:00:00] it over page down bump this over page

[00:00:00] down bump this over page down bump this

[00:00:00] over now we've got a nice little time

[00:00:00] offset happening that should make this

[00:00:00] visually a little more

[00:00:00] interesting there we go I think we can

[00:00:00] go ahead and close up these orange

[00:00:00] layers and now we'll do something

[00:00:00] similar with the Bumble gum layers let's

[00:00:00] come back to one second here so that we

[00:00:00] can actually line up with this other

[00:00:00] animation that's happening I'm going to

[00:00:00] select all of these layers hit P to

[00:00:00] reveal position and create a key frame

[00:00:00] and you'll see it creates that key frame

[00:00:00] frame on all of the selected layers even

[00:00:00] though these are different values right

[00:00:00] now in addition to using your page up

[00:00:00] and page down you can also jump between

[00:00:00] key frames using J and K keys so I'll

[00:00:00] hit J to jump back to the previous key

[00:00:00] frame and with all of these layers

[00:00:00] selected I'll just drag them upwards

[00:00:00] just a little bit in the viewer and then

[00:00:00] I'll hit home to jump back to the very

[00:00:00] beginning and drag these all the way off

[00:00:00] the bottom of the composition you can

[00:00:00] either just keep dragging until it

[00:00:00] pushes it or you may need to zoom out a

[00:00:00] little bit to make sure you see it

[00:00:00] correctly we'll come back down to the

[00:00:00] timeline getting a little harder to see

[00:00:00] everything in here I'll select all of

[00:00:00] these and press F9 to easy ease that

[00:00:00] again and let's

[00:00:00] preview okay pretty

[00:00:00] nice we're going to do that same little

[00:00:00] offset trick here but I think first I

[00:00:00] need a little more room to see my

[00:00:00] timeline let's grab this line right here

[00:00:00] and we'll just drag this up so that we

[00:00:00] can see the panel a little better and

[00:00:00] then if you hold space bar just

[00:00:00] temporarily you'll get a hand tool and

[00:00:00] you can reposition your logo to see it

[00:00:00] and I'll throw one more shortcut at you

[00:00:00] you can use the open and close bracket

[00:00:00] keys to move a layer's in or out point

[00:00:00] to the current frame so if we go page

[00:00:00] down twice and then select this layer

[00:00:00] you can hit Open Bracket to move the

[00:00:00] layer to that time page down select Open

[00:00:00] Bracket page down select Open Bracket

[00:00:00] let's jump back to home and do one more

[00:00:00] preview I think that's feeling pretty

[00:00:00] good but I would like to take these

[00:00:00] layers and maybe bring them over just a

[00:00:00] little bit so they start at about frame

[00:00:00] five or six let's

[00:00:00] say

[00:00:00] six just

[00:00:00] because there we go that feels pretty

[00:00:00] good so we have a nice logo reveal here

[00:00:00] and then we have some elements that keep

[00:00:00] moving just to keep it alive for as long

[00:00:00] as it's on

[00:00:00] screen there's one more little touch I

[00:00:00] would like to do here which will be

[00:00:00] easiest if we do something called

[00:00:00] pre-composting pre-composting is a lot

[00:00:00] like making a smart object you're kind

[00:00:00] of packing this group of layers up into

[00:00:00] one container you can still easily

[00:00:00] access it but this way you can treat

[00:00:00] that group of layers as one single layer

[00:00:00] in your timeline I will select all of

[00:00:00] these Bumble gum layers and you can come

[00:00:00] up here and choose layer de compose of

[00:00:00] course we'll want to give this a

[00:00:00] meaningful name so let's call this

[00:00:00] Bumble

[00:00:00] gum and hit okay and now it's packed all

[00:00:00] of those layers away into one layer but

[00:00:00] we can still access those by just double

[00:00:00] clicking on that and you'll see it has

[00:00:00] all of those same layers and even all

[00:00:00] the same key frames we can go ahead and

[00:00:00] close this back up what I'd like to do

[00:00:00] here is just add a little bit of an

[00:00:00] accent color here so let's take this

[00:00:00] layer come up to edit duplicate so that

[00:00:00] we we make a second version of it and if

[00:00:00] we jump up to our first frame zoom in a

[00:00:00] bit we can just nudge this top copy over

[00:00:00] one frame if you drag your cursor over

[00:00:00] you'll see now we have kind of a second

[00:00:00] copy of our Bumble

[00:00:00] gum and if we use a fill effect to make

[00:00:00] this a different color it'll give a cool

[00:00:00] look so let's come over to our effects

[00:00:00] and presets and search for The Fill

[00:00:00] effect and we'll drop that straight onto

[00:00:00] the bottom copy you'll see it turn red

[00:00:00] which is the default color and if you

[00:00:00] look up in your effect controls you'll

[00:00:00] see you have a Color Picker right here

[00:00:00] and I happen to know that the color I

[00:00:00] want is b0 D2

[00:00:00] a0 I'll hit okay and now we have the

[00:00:00] secondary copy of our text that adds a

[00:00:00] nice accent

[00:00:00] color I'll come up here and make sure I

[00:00:00] save my project as Bloom Bumble

[00:00:00] gum we could totally stop here and use

[00:00:00] this logo as a standalone element but

[00:00:00] we're actually going to use it as part

[00:00:00] of a larger animation that we're about

[00:00:00] to create I'm here in Photoshop with

[00:00:00] this three panel design that would be

[00:00:00] used as a social media Carousel where

[00:00:00] the user flips through each of these

[00:00:00] images themselves and if you're

[00:00:00] designing something like this you're

[00:00:00] already thinking like an animator

[00:00:00] because you're telling a sequential

[00:00:00] story in that case it's just the user

[00:00:00] that gets to decide the pacing we could

[00:00:00] certainly export these three images and

[00:00:00] turn them into a simple animation using

[00:00:00] the skills you've already seen but

[00:00:00] hopefully you're already starting to see

[00:00:00] ways that we could take this quite a bit

[00:00:00] further and what you're able to do with

[00:00:00] this concept will largely come down to

[00:00:00] the way that you structure your design

[00:00:00] instead of three separate frames we

[00:00:00] could instead come up with one single

[00:00:00] design that unifies all of these

[00:00:00] elements and then we could plan to show

[00:00:00] this in a single square frame as we move

[00:00:00] the design through that as well as

[00:00:00] animate some of the individual elements

[00:00:00] here I've prepared that file in

[00:00:00] Photoshop you have this file to it's

[00:00:00] called Bloom Bumble gum. PSD and you can

[00:00:00] see we have those same three images here

[00:00:00] just all created in one unified design

[00:00:00] that will make it easier to send to

[00:00:00] after effects if you look over at the

[00:00:00] layers panel you can see that I've done

[00:00:00] some grouping and I've also put elements

[00:00:00] together with the other items that are

[00:00:00] in the same location now when you create

[00:00:00] Photoshop groups like this these will

[00:00:00] become

[00:00:00] pre-positioned into the background works

[00:00:00] well and having these elements

[00:00:00] precomposed into a texture layer works

[00:00:00] well but I think I'll actually ungroup

[00:00:00] these accent elements because having all

[00:00:00] of these kind of tucked away in a pre-c

[00:00:00] composition might make it hard to

[00:00:00] animate those individually so I'll just

[00:00:00] quickly ungroup those in my opinion it's

[00:00:00] usually a little easier to send more top

[00:00:00] level layers over to After Effects and

[00:00:00] then you can organize and condense stuff

[00:00:00] in there as needed this looks good so

[00:00:00] I'll go ahead and save this file and

[00:00:00] we'll hop over to After Effects we'll

[00:00:00] just keep working in the same After

[00:00:00] Effects project so let's come up to file

[00:00:00] import file and grab that bloom Bumble

[00:00:00] gum PSD that we just

[00:00:00] saw and we'll make sure to import that

[00:00:00] as composition retain layer

[00:00:00] sizes open up that composition and there

[00:00:00] we go just like we saw it in Photoshop

[00:00:00] you'll notice this also brings over the

[00:00:00] guides from Photoshop which can be

[00:00:00] really handy you can come up to the view

[00:00:00] menu and you can turn those off or snap

[00:00:00] to them or not a lot of your sort of

[00:00:00] standard controls you'd expect you can

[00:00:00] also show rulers right here which you

[00:00:00] can also get with controller command R

[00:00:00] and then you can pull guides out just

[00:00:00] like you would expect from the other

[00:00:00] design apps just tuck that back away and

[00:00:00] turn off the ruler looking down at our

[00:00:00] timeline you'll see that unfortunately

[00:00:00] the layer colors from Photoshop don't

[00:00:00] come over so we'll need to recolor those

[00:00:00] and the names are kind of a mouthful

[00:00:00] right now if you pull this out you'll

[00:00:00] see it's giving both the layer name and

[00:00:00] the document name which is more than we

[00:00:00] probably want to look at so right here

[00:00:00] where it says Source name if you click

[00:00:00] on that you can toggle it to just the

[00:00:00] layer name which is easier of course you

[00:00:00] could click on any of these and press

[00:00:00] enter if you wanted to rename it but I

[00:00:00] don't feel like we need to right

[00:00:00] now just bring this back over so we're

[00:00:00] looking at a triple wide composition

[00:00:00] right now which is not what we need

[00:00:00] remember the original frames were just

[00:00:00] 1080 x 1080 so we need to change our

[00:00:00] composition settings to what we actually

[00:00:00] want to deliver this at we'll just come

[00:00:00] up to composition settings here

[00:00:00] and we should be able to just

[00:00:00] choose the social media Square 1080 x

[00:00:00] 1080 at 30 frames per second preset

[00:00:00] that's perfect and for the duration I

[00:00:00] think 10 is probably enough here so we

[00:00:00] can just change that to 10 seconds and

[00:00:00] then hit okay all right this is perfect

[00:00:00] but uh everything's in the wrong place

[00:00:00] right now so we'll need to fix that

[00:00:00] there's a lot of layers here so I want

[00:00:00] to think about which one I want to be

[00:00:00] able to move as kind of my main

[00:00:00] animation and in this case that's the

[00:00:00] background layer so we're going to take

[00:00:00] advantage of parenting again and in this

[00:00:00] case we're going to parent every other

[00:00:00] layer to the background so if you hit

[00:00:00] control or command a you'll select

[00:00:00] everything and then you can use either

[00:00:00] one of these drop- down menus or the pi

[00:00:00] whip either way and just link all of

[00:00:00] those to the background

[00:00:00] layer it won't link to itself so you

[00:00:00] don't need to worry about that and now

[00:00:00] if we change one of the transform

[00:00:00] properties on our background there

[00:00:00] you'll see that everything else goes

[00:00:00] along for the ride and that is exactly

[00:00:00] what we want here let's go ahead and do

[00:00:00] our main animation of this sort of

[00:00:00] scrolling sideways we'll maybe start

[00:00:00] right here at 1 second and create a

[00:00:00] position key frame but we're obviously

[00:00:00] not at the correct start position right

[00:00:00] now now you could certainly eyeball this

[00:00:00] and maybe you could find the right spot

[00:00:00] but we can actually use just a little

[00:00:00] bit a very easy math with After Effects

[00:00:00] doing the work for us to get to exactly

[00:00:00] the right spot now remember this layout

[00:00:00] is exactly 1080 * 3 and right now if

[00:00:00] we're in the middle and we want to be in

[00:00:00] the middle of this section that means

[00:00:00] we're exactly 1080 pixels away from

[00:00:00] where we need to be so if we come down

[00:00:00] to our position property or of course

[00:00:00] you could do this in the properties

[00:00:00] panel same thing if you click on the x

[00:00:00] value of your position press the right

[00:00:00] arrow so that you deselect that number

[00:00:00] and then type Plus plus

[00:00:00] 1080 enter after effects does the math

[00:00:00] for you and it gets us to exactly where

[00:00:00] we want to be now I'll hold shift press

[00:00:00] page down 1 2 3 to jump up to 2 seconds

[00:00:00] and because I was paying attention I saw

[00:00:00] that that previous value was

[00:00:00] 540 so there we go jump up one more

[00:00:00] second 1 two 3 and now we need another

[00:00:00] copy of the same key frame so you could

[00:00:00] click on this little icon here or again

[00:00:00] in the properties panel or you can also

[00:00:00] simply copy paste that existing key

[00:00:00] frame and then jump up one more

[00:00:00] second and we need to be exactly right

[00:00:00] here which means in this case we could

[00:00:00] again come over here and type minus 180

[00:00:00] this time that'll bring us to exactly

[00:00:00] the right

[00:00:00] spot bring our cursor back to the front

[00:00:00] and do a quick

[00:00:00] preview okay we're getting there I'd

[00:00:00] like to make a few adjustments to the

[00:00:00] timing and then we'll definitely want to

[00:00:00] smooth this out as well I think we'll

[00:00:00] give each of these screens just a little

[00:00:00] more time so let's bring our cursor to

[00:00:00] 115 1 and a half seconds here I'll just

[00:00:00] select all of these key frames by

[00:00:00] dragging a box around them and just move

[00:00:00] them up to start right there I think 1

[00:00:00] second is enough time for that move but

[00:00:00] I want to give another half second for

[00:00:00] this screen so let's bring this one up

[00:00:00] to 4 seconds right in between those and

[00:00:00] then just select the these two key

[00:00:00] frames and drag that

[00:00:00] up and then let's preview that one more

[00:00:00] time to see how that timing

[00:00:00] feels that's a little better it gives

[00:00:00] more time to read everything and moves

[00:00:00] along nicely then a nice amount of time

[00:00:00] on our final logo okay like I said

[00:00:00] there's one more thing I want to do and

[00:00:00] that's easy ease these key frames so

[00:00:00] that they don't look so hard and

[00:00:00] mechanical so F9 easy ease one more

[00:00:00] preview

[00:00:00] yes much better much

[00:00:00] better now that we're working in a more

[00:00:00] complex project a few of you may be

[00:00:00] starting to see some performance issues

[00:00:00] with your machine remember that after

[00:00:00] effects is built to be a graphics and

[00:00:00] compositing application it's thinking

[00:00:00] about all the pixels every frame so as

[00:00:00] you stack up more layers and effects it

[00:00:00] has to work harder to do that so let me

[00:00:00] show you a few workflow tips that can

[00:00:00] help you work and preview much faster

[00:00:00] when you're focusing on animation versus

[00:00:00] the final look you don't necessarily

[00:00:00] always need to see everything at full

[00:00:00] quality at the bottom of your viewer

[00:00:00] panel you have the ability to change the

[00:00:00] resolution of what you're seeing in this

[00:00:00] case we'd probably be fine with half or

[00:00:00] third we've got this pretty small up

[00:00:00] here anyway so it's really not going to

[00:00:00] matter too much if you choose Auto it

[00:00:00] will automatically set itself to the

[00:00:00] resolution that's appropriate for the

[00:00:00] magnification that you're looking at

[00:00:00] which in my case is half and I think

[00:00:00] that's plenty when we export this it

[00:00:00] will still be full resolution it's just

[00:00:00] going to make it a little faster to work

[00:00:00] right now I'd also like to come over and

[00:00:00] tweak my preview settings so that we get

[00:00:00] a little better performance there your

[00:00:00] preview is probably at the top of this

[00:00:00] column and if you grab this little bar

[00:00:00] right here and drag down you'll actually

[00:00:00] have quite a few more preview settings

[00:00:00] there are a couple options in here and

[00:00:00] you can change these to whatever you

[00:00:00] prefer personally I like having this

[00:00:00] range set to the work area we're going

[00:00:00] to be changing that quite a bit as we

[00:00:00] work through this animation and I like

[00:00:00] having it restricted to exactly the area

[00:00:00] that I set to so that's what I'm going

[00:00:00] to choose I also like to play from the

[00:00:00] start of range instead of the current

[00:00:00] time you'll notice I've been very

[00:00:00] careful about setting my cursor back to

[00:00:00] the beginning every time we preview and

[00:00:00] if you set this to start of range you

[00:00:00] don't need to do that if you are seeing

[00:00:00] playback issues you can also adjust some

[00:00:00] of these settings right here you

[00:00:00] probably don't want to touch frame rate

[00:00:00] auto is the setting I would recommend

[00:00:00] here especially for newer folks I would

[00:00:00] not recommend previewing at a different

[00:00:00] frame rate than what you're actually

[00:00:00] trying to work at it can be kind of

[00:00:00] confusing but over here this resolution

[00:00:00] can actually be set differently than

[00:00:00] your viewer so if you'd like your

[00:00:00] previews to build more quickly you could

[00:00:00] specifically set your preview resolution

[00:00:00] even lower so you could have the viewer

[00:00:00] set to one resolution as you're looking

[00:00:00] at a static frame but set to a different

[00:00:00] resolution when you're watching previews

[00:00:00] you can also choose to skip frames to

[00:00:00] build the previews even faster if you're

[00:00:00] just roughing out the timing for example

[00:00:00] you can save yourself a lot of

[00:00:00] processing by skipping frames and then

[00:00:00] turn it back up as your animation gets

[00:00:00] more refined and lastly you actually

[00:00:00] have several different shortcut keys

[00:00:00] that you could use to do previews and

[00:00:00] the power user tip here is that you

[00:00:00] could set each of these differently so

[00:00:00] you could set spacebar to be a full

[00:00:00] resolution preview with all the frames

[00:00:00] but you could set numpad zero to be a

[00:00:00] lowres preview that Skips a bunch of

[00:00:00] frames again it's just all up to you and

[00:00:00] how you like to work and one last tip to

[00:00:00] help you work a little faster if your

[00:00:00] machine seems like it's slowing down you

[00:00:00] can come over to your edit menu and

[00:00:00] choose Purge purging these dis caches

[00:00:00] can free up the memory that after

[00:00:00] effects uses to build your previews so

[00:00:00] if things are feeling slow just come

[00:00:00] over here and try one of these all right

[00:00:00] hopefully we're all running a little

[00:00:00] faster now and we'll know how to stay

[00:00:00] that way so let's dive back into that

[00:00:00] animation before we animate anything

[00:00:00] else let's go ahead and color code these

[00:00:00] other layers because it's kind of just a

[00:00:00] big block of the same thing right now

[00:00:00] and it makes it pretty hard to look at

[00:00:00] for my line A and B I'm going to go

[00:00:00] ahead and set those to to Blue for

[00:00:00] Gumball through b I'm going to set those

[00:00:00] to this seafoam color and this would

[00:00:00] have been a little easier to do if I had

[00:00:00] remembered to do it before I trimmed my

[00:00:00] comp down but if I control select made

[00:00:00] with flowers uptier in flavor and

[00:00:00] Powerful pollen those are all the cyan

[00:00:00] layers so I'll set them to cyan here and

[00:00:00] then we have organic nectar and the

[00:00:00] bloom load go I'll set to

[00:00:00] Orange there we go much better and it

[00:00:00] very quickly becomes easy to see each

[00:00:00] little group here and now that we've

[00:00:00] done that we're actually going to dive

[00:00:00] into this background pre composition

[00:00:00] remember in Photoshop this was a group

[00:00:00] and so it means it comes into after

[00:00:00] effects as its own nested composition

[00:00:00] right here so if I double click this we

[00:00:00] can go inside and we'll be able to

[00:00:00] animate these layers in here let's do a

[00:00:00] little color coding in here as well

[00:00:00] maybe set these FL to red and I think

[00:00:00] the rest of the stuff is probably okay

[00:00:00] we could go ahead and just lock this

[00:00:00] background color cuz that doesn't need

[00:00:00] to move at all for these flowers we're

[00:00:00] just going to give them a little bit of

[00:00:00] subtle rotation so I'll select this

[00:00:00] first one here and let's do this up in

[00:00:00] the properties panel just because I'll

[00:00:00] go ahead and create a key frame for

[00:00:00] rotation and remember our other main

[00:00:00] composition is only 10 seconds long so

[00:00:00] we really only need this to be moving

[00:00:00] for that long I'll just set this to

[00:00:00] maybe 45° I don't think it needs to turn

[00:00:00] that much and because we have all this

[00:00:00] dead space back here that we're never

[00:00:00] going to see let's go ahead and trim

[00:00:00] that off of the work area now again we

[00:00:00] could drag this like this but there's

[00:00:00] some shortcut keys that make this much

[00:00:00] faster to set the beginning of this work

[00:00:00] area you press B to set the end of the

[00:00:00] work area press n now I do want this

[00:00:00] beginning to be back at the home so I'll

[00:00:00] just reset that but we be moving these

[00:00:00] around quite a bit when we get back out

[00:00:00] to the main scene let's do a quick

[00:00:00] preview and remember I don't need to

[00:00:00] move this back to home now because I

[00:00:00] changed that preview setting there we go

[00:00:00] I think that's just going to be a nice

[00:00:00] subtle rotation just enough to keep the

[00:00:00] background

[00:00:00] alive now I'd like to copy that to the

[00:00:00] other flowers and I absolutely could

[00:00:00] click here and copy paste to those other

[00:00:00] ones I'm going to show you one other

[00:00:00] technique that's really helpful when you

[00:00:00] want to link multiple things with the

[00:00:00] same animation and maybe don't want to

[00:00:00] have to keep updating multiple layers if

[00:00:00] I select both layer 2 and three and hit

[00:00:00] R to reveal their rotation property you

[00:00:00] might notice that under that parent and

[00:00:00] Link column we parented layers before

[00:00:00] and that's very helpful but you can also

[00:00:00] use this little inset Pi whip right here

[00:00:00] to link properties directly so if I take

[00:00:00] this rotation property and I use the pi

[00:00:00] whip right here to link it to this

[00:00:00] layer's rotation now this text will turn

[00:00:00] red and you'll see a little twirly right

[00:00:00] here and that's because it entered

[00:00:00] what's called an expression these are a

[00:00:00] little more advanced but this wasn't

[00:00:00] hard at all was it we can do the same

[00:00:00] thing for the other layer just link it

[00:00:00] to this one and now these are always

[00:00:00] going to have the same rotation value as

[00:00:00] this layer so if I start scrubbing

[00:00:00] through you'll see as the top one

[00:00:00] changes the other ones always change

[00:00:00] this is a really helpful technique if

[00:00:00] you think you might want to edit that

[00:00:00] value again this way you're only needing

[00:00:00] to make those changes in one place with

[00:00:00] a quick preview we'll see yep they are

[00:00:00] all indeed turning nice slow and subtle

[00:00:00] I think that will be perfect we could

[00:00:00] bring in a little more Life by animating

[00:00:00] these texture layers again just pretty

[00:00:00] subtly I think just the grid and the

[00:00:00] wash texture will do the same thing we

[00:00:00] could make position key frames on both

[00:00:00] of these or we could parent one of them

[00:00:00] to the other and move both of them it's

[00:00:00] really up to you I'll just come back to

[00:00:00] home I'll hit P to reveal position and

[00:00:00] make key frames on both of these and you

[00:00:00] know what I think I'm going to go ahead

[00:00:00] and move these down just a little bit

[00:00:00] now you can see one of these layers the

[00:00:00] grid is actually only as big as the

[00:00:00] composition but in this case we won't

[00:00:00] see that difference so it's okay I'll

[00:00:00] hit K to jump to that next key frame

[00:00:00] taking me to the end of where we need

[00:00:00] this and then we can just move this

[00:00:00] upwards either in the viewer or you can

[00:00:00] use your arrow keys to nudge layers so

[00:00:00] just a little bit there or similar to

[00:00:00] the way you can jump more frames using

[00:00:00] the shift key if you hold shift and

[00:00:00] press the up Arrow a couple times you

[00:00:00] can move these quite a bit let's maybe

[00:00:00] zoom in just a little bit so we can see

[00:00:00] that more clearly and do a quick

[00:00:00] preview yes I think that's going to be

[00:00:00] great we have some nice life in the

[00:00:00] background but it's still pretty subtle

[00:00:00] and it's not going to grab too much

[00:00:00] attention let's go ahead and close this

[00:00:00] pre composition and see how this feels

[00:00:00] up in the main comp I'm going to drag

[00:00:00] this just a little bit bigger so that I

[00:00:00] can zoom in and see pretty much the

[00:00:00] whole thing this starts becoming a

[00:00:00] little bit of a balancing act here

[00:00:00] because we have a lot of layers but we

[00:00:00] also want to be able to see so you just

[00:00:00] need to kind of decide your own

[00:00:00] preference and make adjustments as you

[00:00:00] need let's do a preview boy animating

[00:00:00] that background really adds a lot of

[00:00:00] life doesn't it that's a pretty simple

[00:00:00] trick to be able to add a lot of motion

[00:00:00] without having to do anything too

[00:00:00] difficult we're going to animate this

[00:00:00] text in a minute but I'm noticing these

[00:00:00] lines that would be such a great way to

[00:00:00] lead our viewer through the

[00:00:00] scene right here we have this one and

[00:00:00] then just a bit later we have this very

[00:00:00] curvy one up

[00:00:00] here let's go ahead and work with this

[00:00:00] one first and so I'll just park my

[00:00:00] cursor somewhere right between these two

[00:00:00] key frames and while I still have my

[00:00:00] background selected I'll just press U so

[00:00:00] that we only see those key frames and it

[00:00:00] hides the rest of the properties this

[00:00:00] will be my line a right here so we have

[00:00:00] a couple different ways that we could

[00:00:00] reveal this but since this one is pretty

[00:00:00] simple I think a mask will do the job

[00:00:00] very nicely come back up and grab our

[00:00:00] mask tool and just draw a rectangle

[00:00:00] around that you'll see how it kind of

[00:00:00] reveals it as you draw in this case I

[00:00:00] ended up with a mask color that's a

[00:00:00] little hard to see up in my viewer so

[00:00:00] you can color code these as well by

[00:00:00] clicking on the chip let's just use

[00:00:00] something darker maybe maybe a dark pink

[00:00:00] there we go much easier to see if you

[00:00:00] twirl open your mask right here you can

[00:00:00] actually key frame The Mask path so

[00:00:00] let's go ahead and make a key frame for

[00:00:00] this just come back a few frames we're

[00:00:00] going to need to adjust the timing in a

[00:00:00] minute and then if I hit V to go back to

[00:00:00] my selection tool I can animate this

[00:00:00] entire mask right here just drag it off

[00:00:00] to the left and then you'll see it's

[00:00:00] revealing that line as it animates now

[00:00:00] that's going to be awfully fast so we

[00:00:00] probably want to match this up I might

[00:00:00] need to drag this back up here and this

[00:00:00] mask reveal should probably be about the

[00:00:00] same speed as our background movement

[00:00:00] when you're dragging key frames around

[00:00:00] you can hold shift to make them snap to

[00:00:00] other key frames and since we're just

[00:00:00] focusing on this movement right here

[00:00:00] this would be a good time to maybe go

[00:00:00] around here and hit B and then go around

[00:00:00] here and hit n and so we can just

[00:00:00] preview this short section of the

[00:00:00] animation see how it

[00:00:00] feels okay not too

[00:00:00] bad I'm going to go ahead and easy ease

[00:00:00] these with F9 press U to collapse that

[00:00:00] down and then I might just sneak this a

[00:00:00] few frames earlier let's see

[00:00:00] that yes I think that works better it

[00:00:00] just kind of leads you a little bit

[00:00:00] right before this

[00:00:00] starts we'll also go ahead and start

[00:00:00] trimming some of our layers as we work

[00:00:00] with them so in this case this layer

[00:00:00] doesn't need to exist until this first

[00:00:00] key frame because it's not visible until

[00:00:00] that happens so we could actually trim

[00:00:00] this layer off right here now normally

[00:00:00] you can grab the front of a layer and

[00:00:00] drag it around you can do the same with

[00:00:00] the end but in this case I already moved

[00:00:00] that off the beginning of the timeline

[00:00:00] so I'll use a shortcut key Instead at

[00:00:00] exactly this key frame if I press alt or

[00:00:00] option and the open square bracket

[00:00:00] you'll trim your layer off remember

[00:00:00] earlier we moved a layer by using the

[00:00:00] square bracket keys by themselves so you

[00:00:00] can move a layer with just the square

[00:00:00] brackets or trim them without moving by

[00:00:00] holding alt or option and then we can

[00:00:00] actually scrub up here until this one is

[00:00:00] offscreen maybe around here and then we

[00:00:00] could press alter option and the close

[00:00:00] bracket to trim that off and so as we

[00:00:00] start doing this with all of our layers

[00:00:00] it will be much easier to see what is on

[00:00:00] screen when let's do the same with this

[00:00:00] second line

[00:00:00] here this looks like a good frame to

[00:00:00] work on it so let's grab another mask

[00:00:00] and see how this works again we got kind

[00:00:00] of an odd color so let's just set that

[00:00:00] to something darker a little easier to

[00:00:00] see and I'll grab my selection tool and

[00:00:00] you know thinking about it this may not

[00:00:00] work as well with a mask because as we

[00:00:00] reveal this we're going to have this

[00:00:00] area right here so we can kind of just

[00:00:00] work through this right here this drop

[00:00:00] right here is all going to happen at

[00:00:00] once and I think that's going to be a

[00:00:00] little bit severe so I'm actually going

[00:00:00] to delete this mask and try a different

[00:00:00] technique I'll come over here select the

[00:00:00] mask and press delete I'm going to come

[00:00:00] up here and grab my pen tool right here

[00:00:00] this works just like the pen tool in

[00:00:00] Photoshop and illustrator and with this

[00:00:00] layer selected I'm going to click and

[00:00:00] drag and do my best to trace this path

[00:00:00] if you just click it'll make straight

[00:00:00] lines like this and those won't be quite

[00:00:00] precise enough in this case I'll just

[00:00:00] undo

[00:00:00] those so you want to kind of find your

[00:00:00] curves and then just click and drag to

[00:00:00] pull out these tangent

[00:00:00] handles and just do your best here it

[00:00:00] might take a little

[00:00:00] practice there we go and if you need to

[00:00:00] make any adjustments you can just hit V

[00:00:00] to go back to your selection tool and do

[00:00:00] any little touch-ups that you think you

[00:00:00] might need so now we have a mask but in

[00:00:00] this case it's open so it's not hiding

[00:00:00] the layer we're going to use this to

[00:00:00] drive an effect to reveal this line for

[00:00:00] us instead I'll come over to the effects

[00:00:00] and presets and type in stroke and find

[00:00:00] the stroke effect under generate we will

[00:00:00] add that to our layer right here you may

[00:00:00] see a little bit of a white line on your

[00:00:00] layer originally that's just the default

[00:00:00] setting let's come over to effect

[00:00:00] controls Maybe change this to something

[00:00:00] easy to see like a

[00:00:00] red and then I'm going to turn up this

[00:00:00] brush size until it covers my dotted

[00:00:00] line you could also come back and make

[00:00:00] any tweaks that you need to your path

[00:00:00] but again if we turn this up just a bit

[00:00:00] wider we really aren't going to need to

[00:00:00] be perfect here I'll just turn this up

[00:00:00] to there we go six or seven that's

[00:00:00] plenty and then we'll be able to use

[00:00:00] either the start or end value I'll use

[00:00:00] end in this case to animate this line

[00:00:00] along the path and then we'll use that

[00:00:00] to reveal the layer underneath

[00:00:00] it so let's go ahead and make one key

[00:00:00] frame for end move back just a few

[00:00:00] frames using page up and scrub that all

[00:00:00] the way down to zero we can hit U to

[00:00:00] reveal those key frames page down to

[00:00:00] move forward a frame or two just so we

[00:00:00] can see this and now what we actually

[00:00:00] want is not to see this red line but for

[00:00:00] that to reveal the layer so we need to

[00:00:00] choose paint style and on the drop down

[00:00:00] menu select reveal original image and

[00:00:00] now we can see our original air again we

[00:00:00] just need to time this better so let's

[00:00:00] drag this key frame to match up with

[00:00:00] this one and this key frame to match up

[00:00:00] with this one again we could hit J to

[00:00:00] jump to this key frame and alter option

[00:00:00] Open Bracket to go ahead and trim that

[00:00:00] grab both of these F9 to easy ease and

[00:00:00] like this one we probably want to move

[00:00:00] it just a little bit earlier we can come

[00:00:00] up here to our work area drag this over

[00:00:00] a bit

[00:00:00] and now we'll do this preview and see

[00:00:00] how it

[00:00:00] feels H that might be a bit fast let's

[00:00:00] try that

[00:00:00] again let's go ahead and drag the second

[00:00:00] key frame a little bit

[00:00:00] later that feels much

[00:00:00] better so it looks like I ended up just

[00:00:00] a few frames beyond that move looks like

[00:00:00] I'm at 503 but you can put this wherever

[00:00:00] you'd like now I'll hit home to go back

[00:00:00] to the beginning and press B to stretch

[00:00:00] out my work area let's go ahead and make

[00:00:00] this a bit smaller so we can see the

[00:00:00] whole thing and let's watch this whole

[00:00:00] first portion to pay attention to these

[00:00:00] lines there we go I really like that

[00:00:00] notice how these lines really lead us

[00:00:00] from scene to

[00:00:00] scene this is called it trace and it

[00:00:00] helps you lead your viewer through your

[00:00:00] animation when used effectively you can

[00:00:00] direct your viewers to exactly where you

[00:00:00] want them to look we're going to work

[00:00:00] with the smaller blue text first so I'll

[00:00:00] control click both of those and we're

[00:00:00] going to animate the position property

[00:00:00] so I'll hit P to open that up then I'll

[00:00:00] nudge this by holding shift and pressing

[00:00:00] the left Arrow once maybe twice and then

[00:00:00] make a key frame we'll move forward a

[00:00:00] bit on the timeline and then shift right

[00:00:00] arrow twice to get back to the original

[00:00:00] position and then twice more to balance

[00:00:00] that out with those first key frames and

[00:00:00] so so this is going to give just kind of

[00:00:00] a nice little drift on these layers that

[00:00:00] feels a little fast right now so we'll

[00:00:00] go ahead and drag these

[00:00:00] over and see how this works out okay I

[00:00:00] think that'll be

[00:00:00] fine and then I think it might be a

[00:00:00] little more interesting if they were

[00:00:00] moving in two different directions so I

[00:00:00] will highlight these two key frames on

[00:00:00] the lower of the two layers right click

[00:00:00] key frame assistant and choose time

[00:00:00] reverse key frames just going to swap

[00:00:00] them so now that same animation happens

[00:00:00] backwards there we go I think that's

[00:00:00] pretty

[00:00:00] interesting and once those layers are

[00:00:00] off screen again we could trim them so

[00:00:00] we'll come to this key frame right here

[00:00:00] and we could select both of those and

[00:00:00] alter option close bracket now let's do

[00:00:00] the same with these up to your and in

[00:00:00] flavor I'll select both of them here

[00:00:00] shift and the arrow to nudge them over

[00:00:00] add a position key frame using whichever

[00:00:00] method you like jump up just a few

[00:00:00] frames nudge them back to the

[00:00:00] right and then let's go ahead and bring

[00:00:00] those key frames out I bet about halfway

[00:00:00] through those moves would probably work

[00:00:00] fine and since I'm moving these anyway I

[00:00:00] could just manually reverse these by

[00:00:00] grabbing the second one moving it up

[00:00:00] front and moving that one

[00:00:00] there let's see if that's enough oh they

[00:00:00] need to be just a little further just

[00:00:00] before they come on screen I'll grab

[00:00:00] both of those adjust them over go ahead

[00:00:00] and trim these layers off while I'm here

[00:00:00] and then move up and looks like we need

[00:00:00] to be right here so let's move these key

[00:00:00] frames over just a bit and trim those

[00:00:00] layers off and see how obviously we've

[00:00:00] got some stragglers right now but this

[00:00:00] all will feel much nicer in the timeline

[00:00:00] once we get everything tidied

[00:00:00] up yeah that's nice

[00:00:00] and for powerful pollen I think that

[00:00:00] would be nice if it sort of slides over

[00:00:00] to meet this line right as it lands so

[00:00:00] let's grab this we can go ahead and just

[00:00:00] move this over to trim open up our

[00:00:00] position create a key frame for where we

[00:00:00] want it to land and move back a bit and

[00:00:00] just kind of decide how far you want it

[00:00:00] to slide it's up to you we'll move this

[00:00:00] over to the beginning of the layer and

[00:00:00] just kind of make sure we time that so

[00:00:00] it happens just before we would see it

[00:00:00] maybe one more

[00:00:00] frame there we go and we might want that

[00:00:00] to land just after that other animation

[00:00:00] stops and we could probably just ease

[00:00:00] only this second key frame let's maybe

[00:00:00] watch just that portion so I'll come

[00:00:00] here Press B to shorten my work area and

[00:00:00] see how that

[00:00:00] feels not bad I might tweak twak this

[00:00:00] just a little bit move it up so that

[00:00:00] move happens just a little bit slower

[00:00:00] bring this back over just a few frames

[00:00:00] later this is the part where you need to

[00:00:00] just kind of watch it and adjust until

[00:00:00] it feels

[00:00:00] right I'll maybe move that back just a

[00:00:00] frame or

[00:00:00] two that feels pretty good to

[00:00:00] me okay now let's come back and work

[00:00:00] with these big hero text pieces I'll

[00:00:00] bring my work area back up front here

[00:00:00] and maybe extend it just a little bit

[00:00:00] and we'll work with Organic to figure

[00:00:00] out the look and then we'll be able to

[00:00:00] apply that to nectar as well you might

[00:00:00] remember from before that it's pretty

[00:00:00] easy to convert a Photoshop text layer

[00:00:00] into editable After Effects text and

[00:00:00] that's what we're going to do here so

[00:00:00] let's go ahead and do both of them at

[00:00:00] once I'll shift select this nectar layer

[00:00:00] we'll right click choose create convert

[00:00:00] to editable text you'll see their icons

[00:00:00] Chang to text layers and now we can work

[00:00:00] with them in this case I'm going to

[00:00:00] apply an animation preset again just

[00:00:00] because that's easy I'm going to choose

[00:00:00] one called slide in from comp Edge

[00:00:00] that's a newer preset that I think will

[00:00:00] work really nicely let's just drop that

[00:00:00] onto our organic here and you should see

[00:00:00] it disappear because it's the beginning

[00:00:00] of the animation if you press U you'll

[00:00:00] see the key frames here and we're we're

[00:00:00] about to make some other adjustments

[00:00:00] this preset gives you quite a few

[00:00:00] controls up in your effect controls and

[00:00:00] so if you scrub through you can see

[00:00:00] what's happening in this case it's

[00:00:00] animating the entire word at once which

[00:00:00] is not really what I want and it's

[00:00:00] happening from the top which is also not

[00:00:00] what I want but you have all these handy

[00:00:00] controls right here to change that

[00:00:00] easily I'll change this one to

[00:00:00] bottom and I'll change animate by from

[00:00:00] word to character and so now this preset

[00:00:00] is actually aware of the size of your

[00:00:00] composition and it's going to animate

[00:00:00] each

[00:00:00] character from the bottom up into

[00:00:00] position I think that feels pretty nice

[00:00:00] I think I would actually like this one

[00:00:00] to start with the o a little

[00:00:00] higher so let's come back to our home

[00:00:00] and you can actually take this

[00:00:00] completion slider because this is a 0 to

[00:00:00] 100 again so I'll just scrub this value

[00:00:00] up a bit until this o is just touching

[00:00:00] that little

[00:00:00] gumball and let's see how that feels

[00:00:00] yeah I like that we're not waiting so

[00:00:00] long for that to get up into place

[00:00:00] now okay let's do something similar with

[00:00:00] nectar go ahead and adjust our work area

[00:00:00] here maybe something like this let's go

[00:00:00] ahead and grab that same preset and

[00:00:00] apply it to our nectar

[00:00:00] layer and it's important to note that

[00:00:00] when you use an animation preset it gets

[00:00:00] applied at the frame where you're CTI is

[00:00:00] currently located so that first key

[00:00:00] frame is right there and then you can

[00:00:00] see the second one let's go ahead and

[00:00:00] press U so we can see those better and

[00:00:00] we'll come back up here change top to

[00:00:00] bottom and change word to character

[00:00:00] again and then just quickly scrub

[00:00:00] through okay that looks good we just

[00:00:00] need to adjust the

[00:00:00] timing scroll down in our timeline just

[00:00:00] a bit so we can see those key frames

[00:00:00] from the background and I think this

[00:00:00] animation probably needs to start just

[00:00:00] before that is revealed on screen maybe

[00:00:00] around here so we can grab those key

[00:00:00] frames and Scoot them over and go ahead

[00:00:00] and trim our layer right there and let's

[00:00:00] preview pretty good I might drag this

[00:00:00] second key frame just a bit to slow that

[00:00:00] down maybe not quite that

[00:00:00] much all right let's watch it in context

[00:00:00] with the first one and see if they both

[00:00:00] feel good

[00:00:00] I'm happy with

[00:00:00] that let's go ahead and save our work

[00:00:00] and to match what we did on the logo

[00:00:00] animation which we'll add to this in

[00:00:00] just a second I'm going to duplicate

[00:00:00] these layers and add a secondary color

[00:00:00] to them so let's come up here with

[00:00:00] Organic we'll grab that layer and hit

[00:00:00] control or command D to duplicate it and

[00:00:00] then we'll nudge this top copy over one

[00:00:00] frame you should see that here in your

[00:00:00] viewer

[00:00:00] and then we'll select the bottom

[00:00:00] copy and over in your properties panel

[00:00:00] you have a fill right here and we can ey

[00:00:00] dropper this to this light green and so

[00:00:00] we get that same kind

[00:00:00] of oops we probably need to just nudge

[00:00:00] both of those over one frame to fix that

[00:00:00] good enough there we go and then we'll

[00:00:00] do the same thing for nectar controll or

[00:00:00] command D to duplicate move the top copy

[00:00:00] over one frame select the bottom copy

[00:00:00] and then I Dro her to that pale

[00:00:00] green and again give that a quick look I

[00:00:00] think that feels nice we'll go ahead and

[00:00:00] bring our cursor over here and let's add

[00:00:00] that animated logo that we created

[00:00:00] earlier I'll come back over to my

[00:00:00] project panel let's close that up so we

[00:00:00] can actually see what we need and this

[00:00:00] will be our Bloom logo that we created

[00:00:00] earlier I'm just going to grab that and

[00:00:00] bring it down into my composition and

[00:00:00] you'll notice as I drag vertically you

[00:00:00] can choose where in the layer stack this

[00:00:00] new layer goes so I'll just bring this

[00:00:00] down and put it right above this other

[00:00:00] Bloom logo it's a bit too big right now

[00:00:00] so we'll need to adjust that let's come

[00:00:00] down here in our timeline and on this

[00:00:00] new precomposed version of our Bloom

[00:00:00] logo we could hit s to open up the scale

[00:00:00] and just scale that down until we find

[00:00:00] the right size if you want to be more

[00:00:00] precise you can hold control or command

[00:00:00] while you

[00:00:00] scale I'm finding this a little hard to

[00:00:00] match up so I'm going to show you a

[00:00:00] little trick

[00:00:00] if we click right here to toggle these

[00:00:00] switches and modes we could choose a

[00:00:00] blending mode that makes it a little

[00:00:00] easier to match this up let's choose the

[00:00:00] difference mode and then anything that's

[00:00:00] exactly the same will turn to black so

[00:00:00] we can just use our arrow keys here to

[00:00:00] nudge this layer around until we get it

[00:00:00] into just the right spot that looks

[00:00:00] pretty perfect obviously the flowers is

[00:00:00] a little different because they're

[00:00:00] animated now that that is set I will put

[00:00:00] this layer back to

[00:00:00] normal and delete our original Bloom

[00:00:00] logo because we don't need that anymore

[00:00:00] but we do need to make sure that this

[00:00:00] new one which we can go ahead and turn

[00:00:00] orange we need to make sure that that is

[00:00:00] parented to the background like

[00:00:00] everything else and then we'll figure

[00:00:00] out the timing by just scooting this

[00:00:00] over to somewhere during those two key

[00:00:00] frames where we're moving into position

[00:00:00] here let's come around here hit B to set

[00:00:00] the beginning of our work area and we'll

[00:00:00] drag this out a bit just to kind of make

[00:00:00] sure that lands at the right

[00:00:00] time that feels pretty good to me we're

[00:00:00] getting really close we've got all of

[00:00:00] our major pieces animated but paying

[00:00:00] attention to the details even if you're

[00:00:00] just adding something subtle is the best

[00:00:00] way to make sure your animation will be

[00:00:00] really engaging let's go ahead and jump

[00:00:00] back to the very beginning of our

[00:00:00] composition and we'll quickly animate

[00:00:00] this star shape which is right here

[00:00:00] layer 14 this is getting a little little

[00:00:00] cluttered so let's just hit contr a to

[00:00:00] select everything and twirl these

[00:00:00] closed we could do a little bit of

[00:00:00] trimming as well organic is off screen

[00:00:00] so we can trim that away and then up

[00:00:00] here when nectar gets off screen we can

[00:00:00] trim that away and again it becomes very

[00:00:00] easy to kind of see each group of layers

[00:00:00] here so let's do the same with our star

[00:00:00] shape that white one is off screen here

[00:00:00] so you can trim

[00:00:00] that it'll work with this one right here

[00:00:00] which comes on screen right here so

[00:00:00] we'll Trim

[00:00:00] in move down a bit until it's offscreen

[00:00:00] and trim out now let's extend our work

[00:00:00] area back to the beginning here let's

[00:00:00] select that down in the timeline and

[00:00:00] I'll reveal the rotation property by

[00:00:00] pressing R make a key frame here at zero

[00:00:00] and we'll probably place this second key

[00:00:00] frame near the end of the layer but we

[00:00:00] won't really be able to see that because

[00:00:00] of the move so I'll kind of just eyeball

[00:00:00] this bring this value to I don't know 22

[00:00:00] 23 that's probably enough and then we'll

[00:00:00] just scoot that key frame over to the

[00:00:00] out point of the layer let's do another

[00:00:00] quick check on

[00:00:00] that

[00:00:00] perfect and we'll do something similar

[00:00:00] with this one I think rotation might be

[00:00:00] a little weird since it only has four

[00:00:00] points let's maybe try scale on that one

[00:00:00] so we'll press s to open up the scale

[00:00:00] let's bring that down to maybe I don't

[00:00:00] know about 80 or or so make a key frame

[00:00:00] we can take that up towards the

[00:00:00] beginning of the layer and then we'll go

[00:00:00] up to around 100 or maybe just over

[00:00:00] again this is kind of up to

[00:00:00] you and normally I would be careful

[00:00:00] about going above 100% but I don't think

[00:00:00] it'll matter too much on that background

[00:00:00] shape let's quickly press end and then

[00:00:00] the N key to set our work area so we get

[00:00:00] to watch the whole thing and let's see

[00:00:00] what we think

[00:00:00] I think this is feeling pretty good

[00:00:00] there's another detail I'd like us to

[00:00:00] look at though you might remember the

[00:00:00] technique we used to animate the texture

[00:00:00] in our very first example you could use

[00:00:00] that exact same idea here let's just

[00:00:00] doubleclick that speckle texture which

[00:00:00] is another pre composition and you'll

[00:00:00] see inside here we actually have two

[00:00:00] layers a white and a blue you may not be

[00:00:00] able to see much of the difference here

[00:00:00] I would just zoom out let's go ahead and

[00:00:00] change one of these to a different color

[00:00:00] just so it's a little easier to

[00:00:00] see and then I would come back to the

[00:00:00] very beginning of the composition select

[00:00:00] both of these press P to reveal position

[00:00:00] make a key frame for both and then we

[00:00:00] can go ahead and set these to hold key

[00:00:00] frames Now by right clicking toggle hold

[00:00:00] key frame and now any key frames you

[00:00:00] create on the rest of this will all be

[00:00:00] hold key frames so you can decide for

[00:00:00] yourself what Rhythm feels good you

[00:00:00] could make another key frame every

[00:00:00] second or every 15 Fram frames that's up

[00:00:00] to you you probably also noticed these

[00:00:00] other great green details like these

[00:00:00] little gumballs and here you have a few

[00:00:00] more and this other little green shape

[00:00:00] and then you have this fun little be

[00:00:00] friend here at the end as well I'm

[00:00:00] certainly seeing some opportunities to

[00:00:00] bring those bits to life but I think

[00:00:00] this is a good place to go ahead and

[00:00:00] wrap up our lesson and I'll leave it to

[00:00:00] you to finish up those elements on your

[00:00:00] own if you'd like to when you're done

[00:00:00] make sure to save your project and then

[00:00:00] export your animation just like we did

[00:00:00] earlier most importantly share it with

[00:00:00] someone whose opinion you trust and ask

[00:00:00] if they have any feedback for you this

[00:00:00] is a great way to start learning what

[00:00:00] other people will notice and to help you

[00:00:00] start developing that I for yourself

[00:00:00] thanks again for watching in the next

[00:00:00] video we'll explore techniques for

[00:00:00] creating elements directly within After

[00:00:00] Effects itself and then of course we'll

[00:00:00] make the move see you then